Android
Provided Libraries
In this section, we will learn about the integration of the Master Controller SDK into a sample Android application.
The MC SDK comes with the following libraries, which are all required for proper functioning (except "uihardening" and "kssidp"):
wrapper-release.aar: and wrapper-debug.aar: These Android libraries contain all classes of the MC API. There is no difference between the build flavors apart from the ability of debugging native code (c / c++) with wrapper-debug.
hardening-release.aar: and hardening-debug.aar: These libraries contain security mechanisms which help the native hardening for some additional protection. Only with the hardening-debug your apps can be started with the Android Debugger, and run inside Emulators.
proxy_static-release.aar and proxy_static-debug.aar: These libraries contain our trusted WebView solution. There is no difference between the build flavors apart from the ability to debug with proxy_static-debug.
androidloader-release.aar This library prevents attackers from loading/investigating our native libs.
androidloader-debug.aar Same as the release flavor but with added logs.
hardeningBridge-release.aar This library ensures a secure communication of the SDK with the hardening, androidloader, and proxy_static libraries. Use it in combination with the release flavor of the above mentioned libraries.
hardeningBridge-debug.aar This library ensures the communication of the SDK with the debug flavors of hardening, androidloader, and proxy_static libraries. Use it in combination with the debug flavor of the above mentioned libraries.
AndroidInterface-release Helper Library for the Android JNI interface between Java and C/C++. Used by the above mentioned components.
uihardening-release Optional library that allows to protect certain views or layouts from UI attacks.
configurator-release Securely stores sensitive web data and ensures data protection rules by encrypting cache files.
kssidp-wrapper-release Optional library that allows to authenticate app users with Shift native flows.
Do NOT use any of the debug flavor libs for releases/production!
We deliver the libraries in the same combination as tested in our QA. We urge customers to use the same combination of libs as was delivered. Do NOT mix libraries form different release packages. It helps troubleshooting, as we know the exact combination of lib versions used with each delivery.
Overview of the differences between the hardening-release and the hardening-debug library:
| Debug | Release |
|---|---|
| It is possible to start the app in the emulator. | It is NOT possible to start the app in the emulator. |
| For development purposes. It may NOT be distributed to the end user. | For distribution to the end user. |
| It is possible to start the app in the Android debugger. | An app cannot be started with a debugger (debugger detection). |
| A message (Android Toast) is displayed notifying that the debug library is being used. |
Emulator Support
As mentioned earlier, only the debug version can be run on emulators. Even if the selected emulator runs reasonably well on your computer, there are still significant timing differences between release and debug versions. This is because the hardening features consume noticeable amounts of CPU time, which are essentially disabled in the debug version. So, while the emulator can be useful for developing and debugging the app, it cannot fully replace testing the app on a real device. Additionally, if your SDK configuration relies on the Secure Enclave, attempting to run it on an emulator will always result in failure. In such cases, you will always need to test and debug your app on a real device.
Dependencies
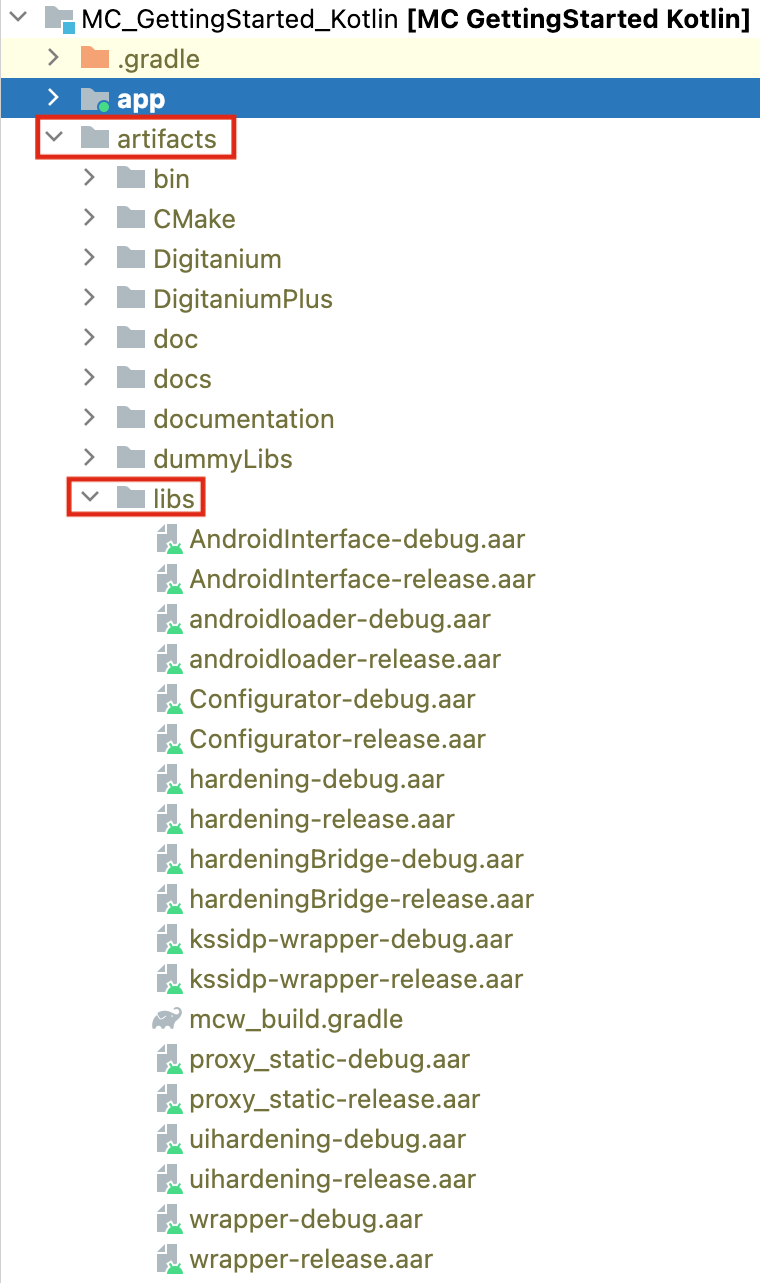
1. To enable our project to recognize Master Controller-related files, we need to include the necessary dependencies. Create a folder named "artifacts" in the main project directory. Inside this folder, create another folder named "libs" and place the dependency files there.
Project -> artifacts -> libs
2. Once the dependency files are placed in the "libs" folder, you must specify the path to these library files in the dependencyResolutionManagement section of your project's settings.gradle file.
dependencyResolutionManagement {
    ...
    repositories {
        ...
        flatDir {
            dirs 'artifacts/libs'
        }
        ...
    }
}
3. a) Now, simply add the following line inside your app's build.gradle file and sync or build the project:
apply from: '../artifacts/libs/mcw_build.gradle'
3. b) Alternatively, if you prefer not to use the mcw_build.gradle provided with the libraries, you can add the following code inside the android section of your app's build.gradle file:
    // both of these native libraries should not be stripped
    packagingOptions {
        doNotStrip "**/libnb.so"
        doNotStrip "**/libhnb.so"
    }
and then add the following within the dependencies section of your app: build.gradle:
debugImplementation (name: 'wrapper-debug', ext: 'aar')
releaseImplementation (name: 'wrapper-release', ext: 'aar')

debugImplementation (name: 'androidloader-debug', ext: 'aar')
releaseImplementation (name: 'androidloader-release', ext: 'aar')

debugImplementation (name: 'hardening-debug', ext: 'aar')
releaseImplementation (name: 'hardening-release', ext: 'aar')

debugImplementation (name: 'hardeningBridge-debug', ext: 'aar')
releaseImplementation (name: 'hardeningBridge-release', ext: 'aar')

debugImplementation (name: 'proxy_static-debug', ext: 'aar')
releaseImplementation (name: 'proxy_static-release', ext: 'aar')

debugImplementation(name: 'Configurator-debug', ext: 'aar')
releaseImplementation(name: 'Configurator-release', ext: 'aar')

debugImplementation (name: 'AndroidInterface-debug', ext: 'aar')
releaseImplementation (name: 'AndroidInterface-release', ext: 'aar')
- MC SDK supports the usage of Secure elements to create and store sensitive key pairs.
- Android app developers should add Strongbox dependencies to their app in order to be able to use this feature:
Strongbox dependencies
dependencies {
    ...
    // Secure elements
    implementation("org.bouncycastle:bcpkix-jdk15to18:1.78.1")
    ...
}
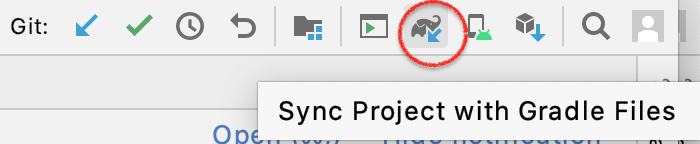
sync the project with gradle files before building it for the first time.
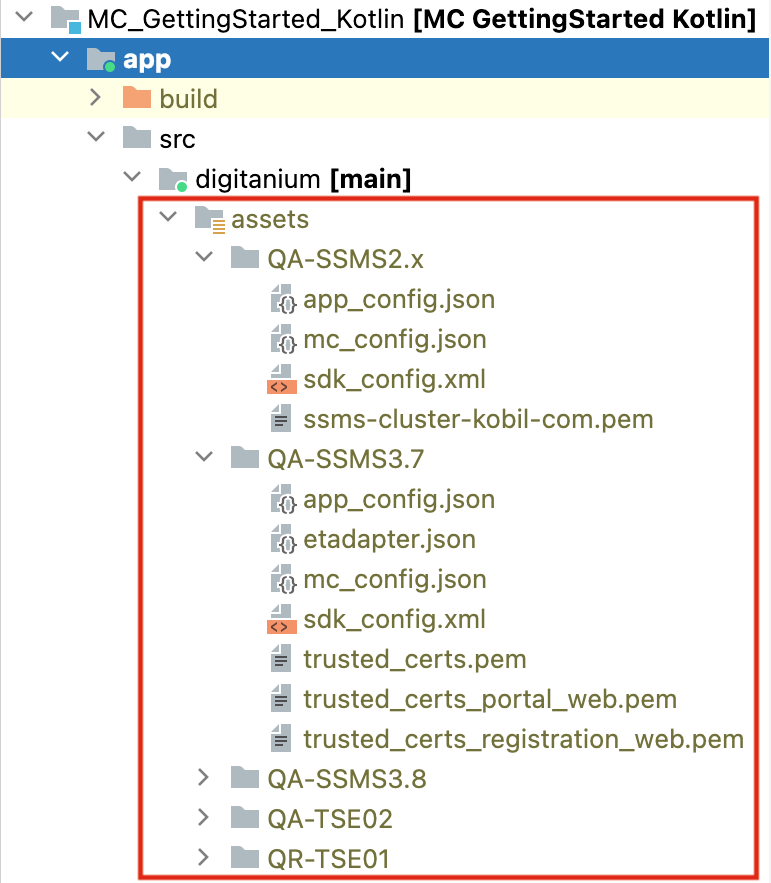
4. Apart from the Master Controller dependency files, there are the some config files that are also required. Current GettingStartedApp includes some example server configurations. User can choose any of the configurations among these. For enabling these server configurations, You must create a directory called assets within app -> main folder and copy the folders with respective files. The significance of the folder files is given below:
-
app_config.json - This app level configuration file contains configuration related information like WebPortal Url (through which we perform Transaction), list of some trusted server certificate, ... .
-
mc_config.json - MC Configuration file
-
sdk_config.xml / sdk_config.jwt - MC Configuration file
-
LICENSE_KOBIL_en.txt - Using this file we show the legal information in the application.
-
** .pem* - Trusted TLS server certificates referenced in the other configuration files.
Initial Steps
- Make sure you have library files related to Master Controller and Proxy in your project also you have created assets folder and put the mentioned configuration files in it.
- Register your app version in Security Server.
Backup of your Android device
For security reasons KOBIL App Security's device binding parameter is not stored when you make a backup. So, after restoring a backup the user will loose the activation and has to activate the app again.
Therefore, KOBIL recommends to explicitly disallow app backup. Before Android 12, this was done by simply setting android:allowBackup and possibly android:fullBackupContent in the AndroidManifest.xml of your app. Since Android 12, you need an additional file with dataExtractionRules and you need to add a reference to that file into the manifest as well. So, AndroidManifest.xml could look similar to this:
<?xml version="1.0" encoding="utf-8"?>
<manifest xmlns:android="http://schemas.android.com/apk/res/android"
    xmlns:tools="http://schemas.android.com/tools"
    package=...>

    ....

	<application
        android:allowBackup="false"
		android:fullBackupContent="false"
        android:dataExtractionRules="@xml/data_extraction_rules"
		....>
	...
	</application>
</manifest>
The data extraction rules would be given in res/xml/data_extraction_rules.xml like this:
<?xml version="1.0" encoding="utf-8"?>
<data-extraction-rules>
 <cloud-backup>
   <exclude domain="root" path="." />
   <exclude domain="file" path="." />
   <exclude domain="database" path="." />
   <exclude domain="sharedpref" path="." />
   <exclude domain="external"  path="."/>
 </cloud-backup>
 <device-transfer>
   <exclude domain="root" path="."/>
   <exclude domain="file" path="."/>
   <exclude domain="database" path="."/>
   <exclude domain="sharedpref" path="."/>
   <exclude domain="external" path="."/>
 </device-transfer>
</data-extraction-rules>