Configuration of Token Permissions
IDP 5 provides a high-level and effective solution to handle the exchange of your tokens between your external services.
Follow the recommended steps below to restrict or configure Exchange IAM Token features in your identity provider platform.
Step1: Create Client Policy into your workspace
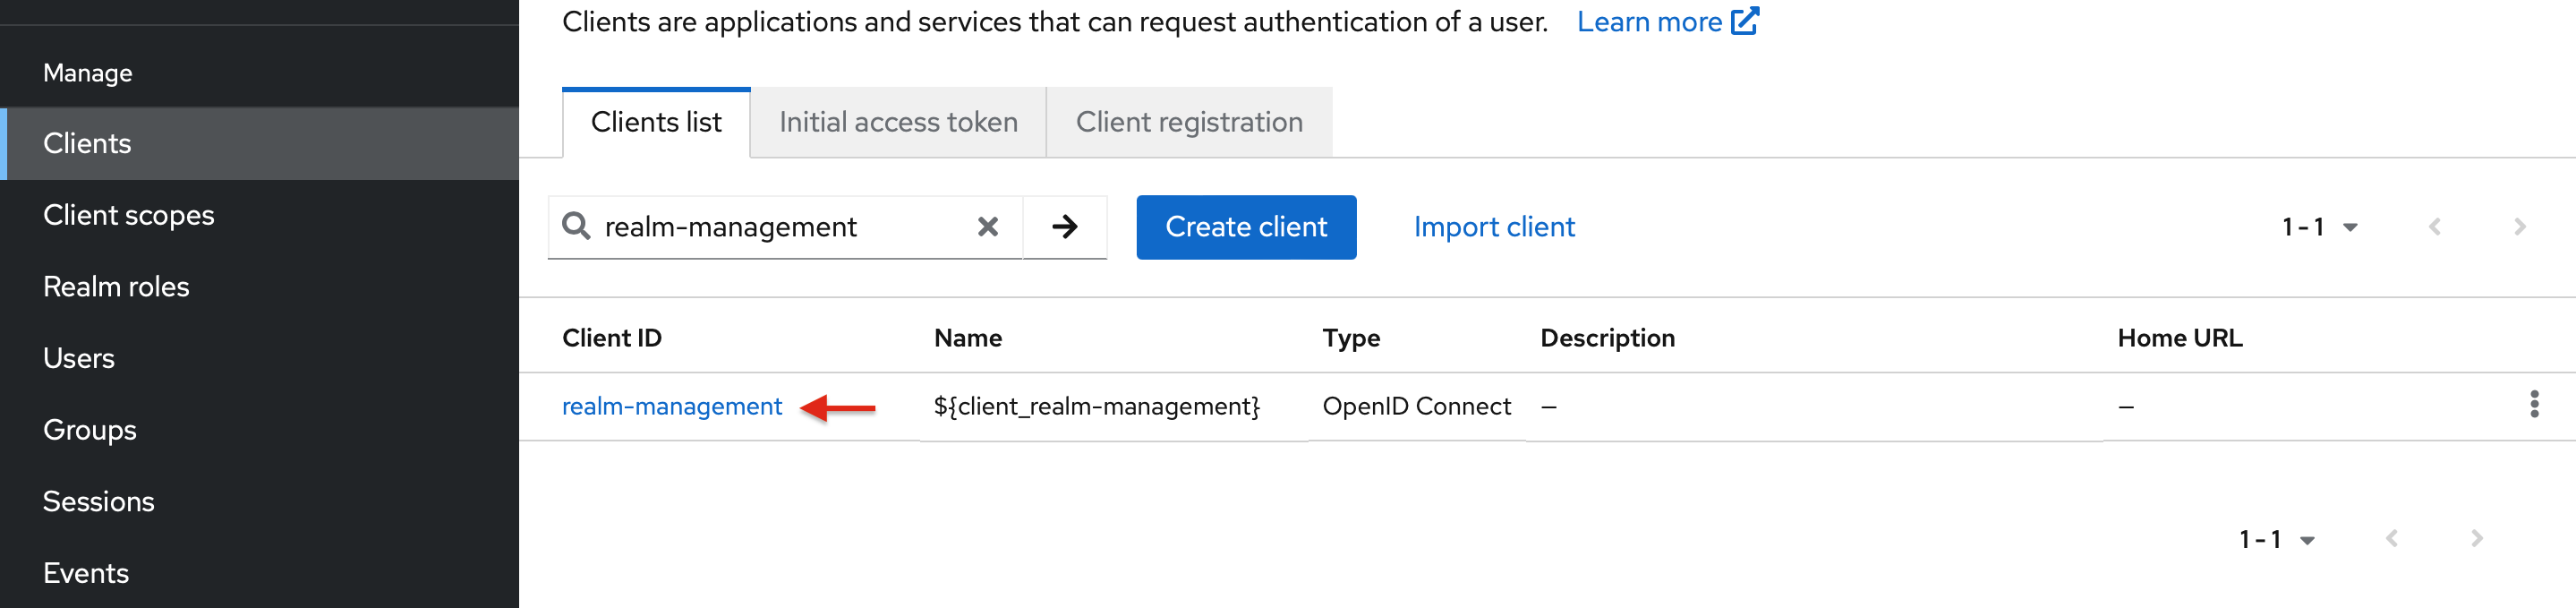
- Search for the realm-management in your client list, then select it.
Create Client Policy
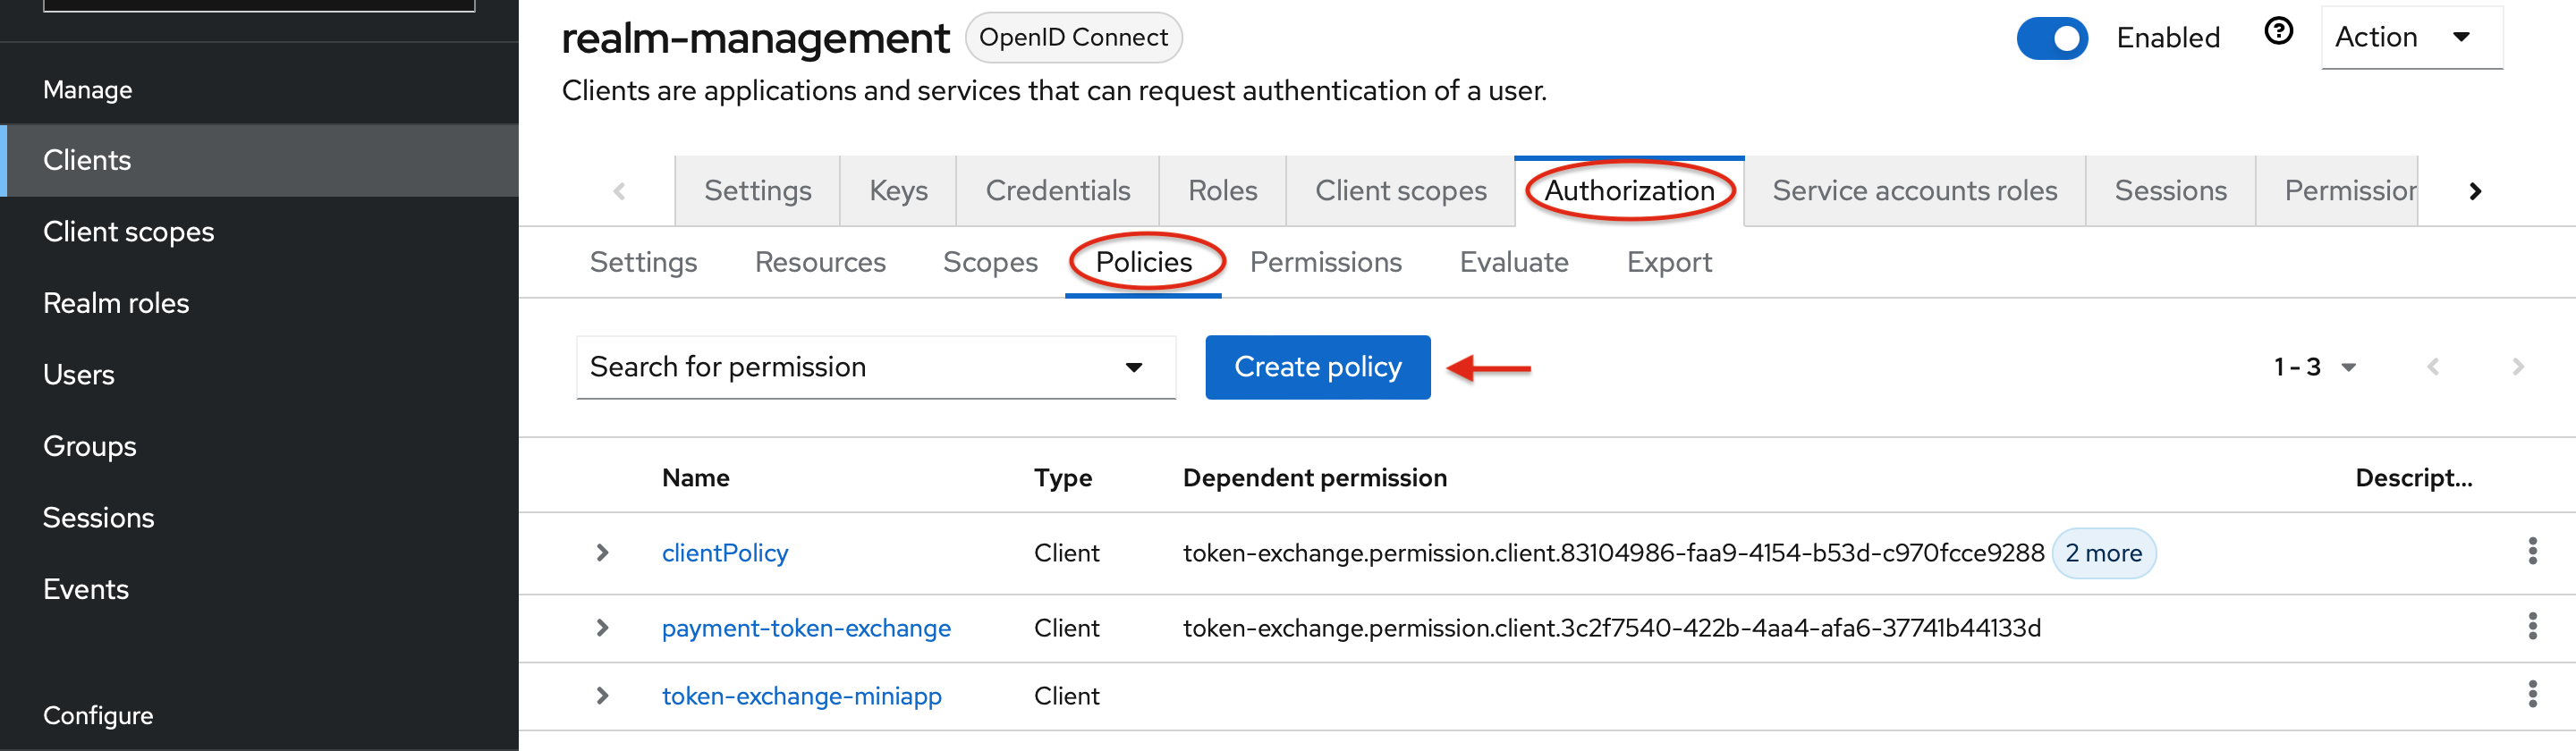
- Reach to the Authorization -> Policies section of your realm-management, and press Create policy button.
Choose Policy Type
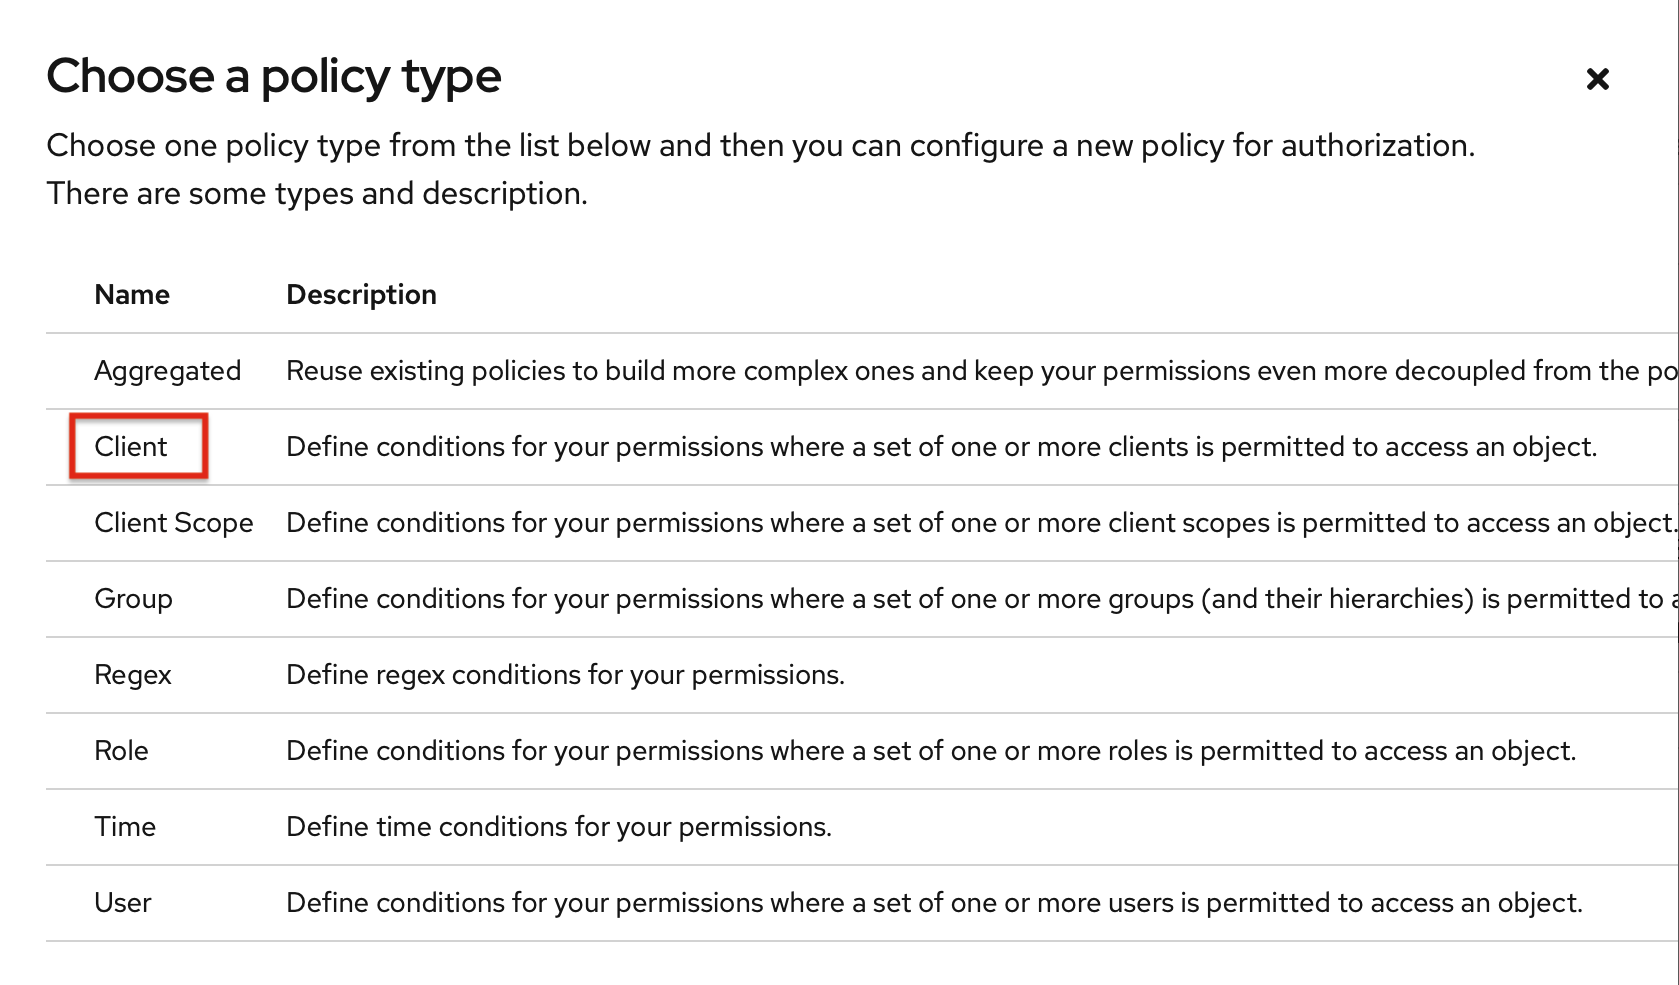
- While creating a policy, please select the policy type as Client. This will support you to define your Source Client.
Setup your Client Policy
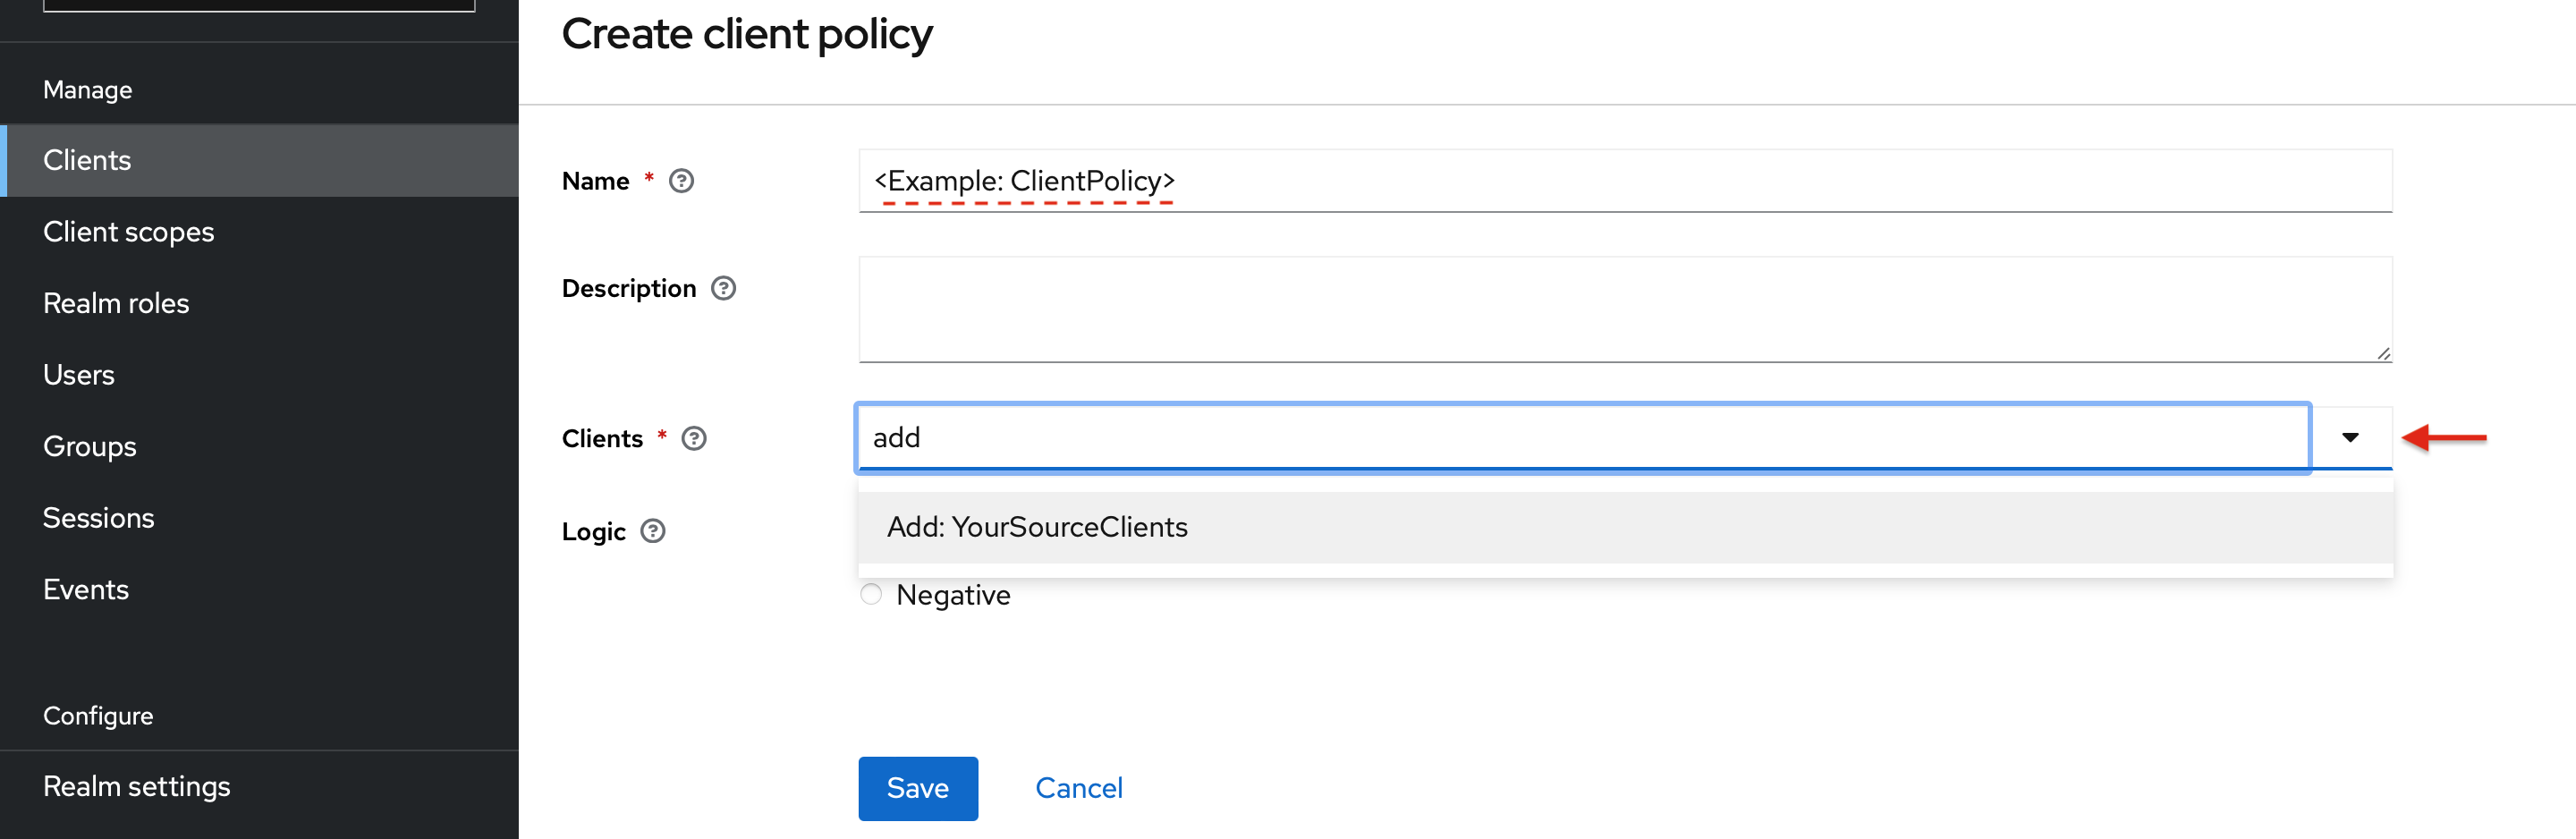
- Once the policy type is slected as Client, please specify the name of your policy and Source Client.
⚠️NOTE: Any client of your Workspace could be assigned as a Source Client, but clients used for the Authentication methods should not be selected.
Step2: Apply Policy to your Target Client
- Let's assume that, Target Client(audience) is created in your workspace, and called as ExchangeToken.
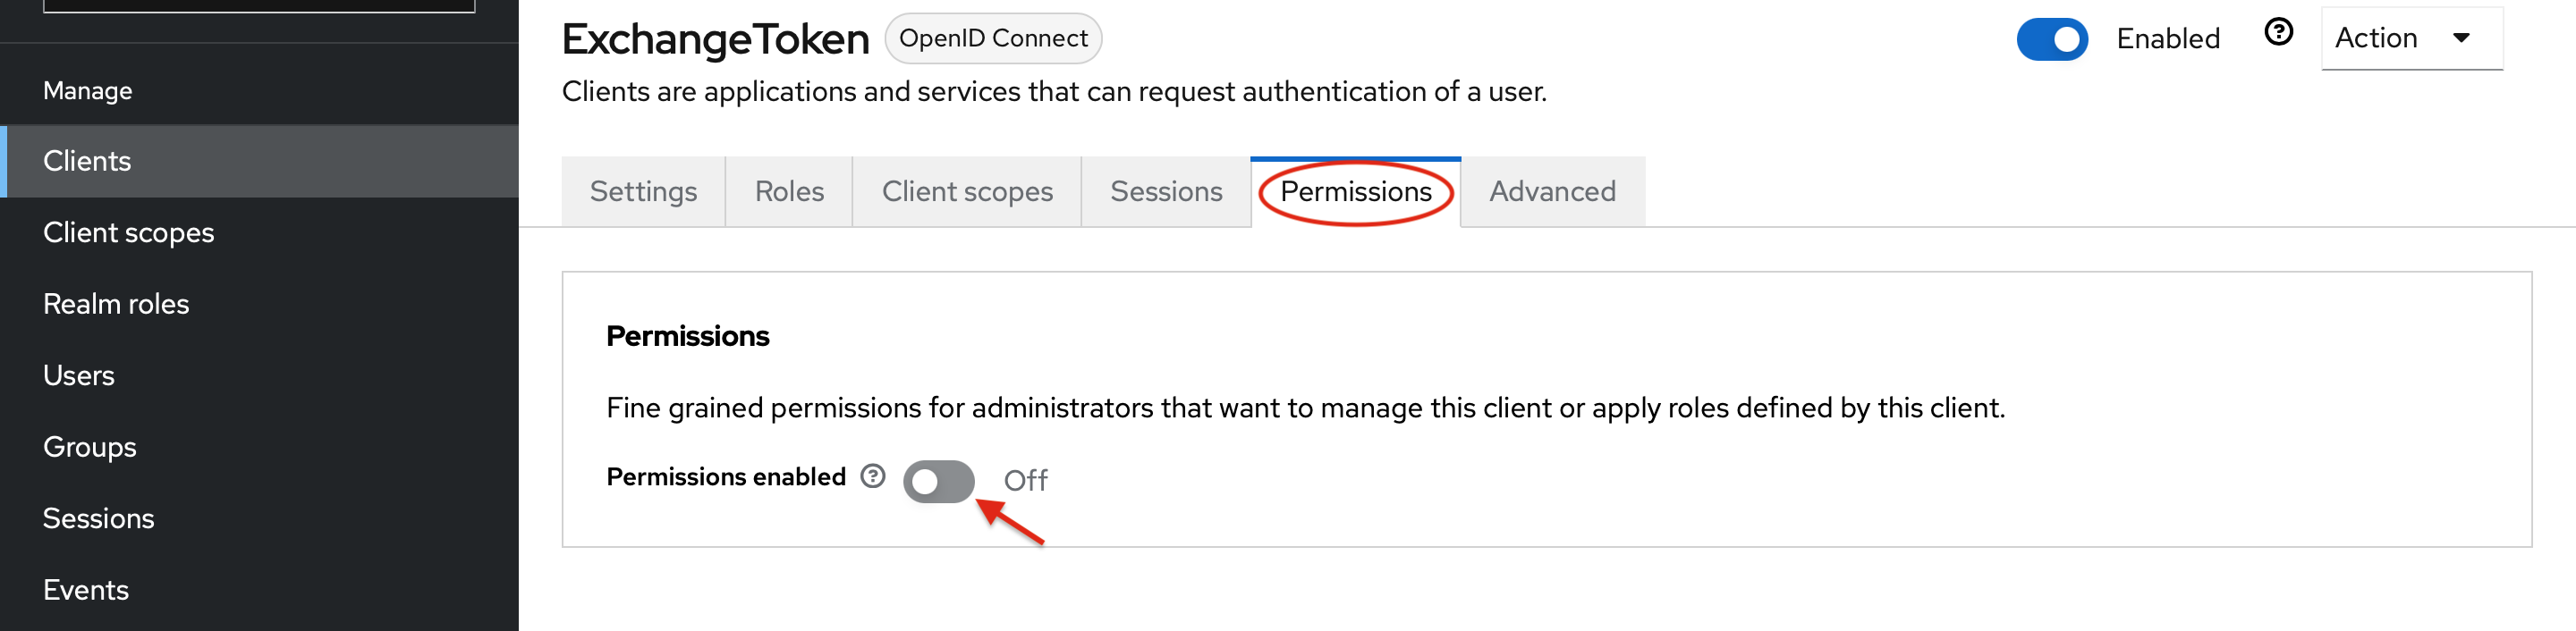
- Navigate to Permissions section of your Target Client.
- Then turn ON the Permission enabled option to remove all current permissions that have been set up.
Allow Exchange Token Features
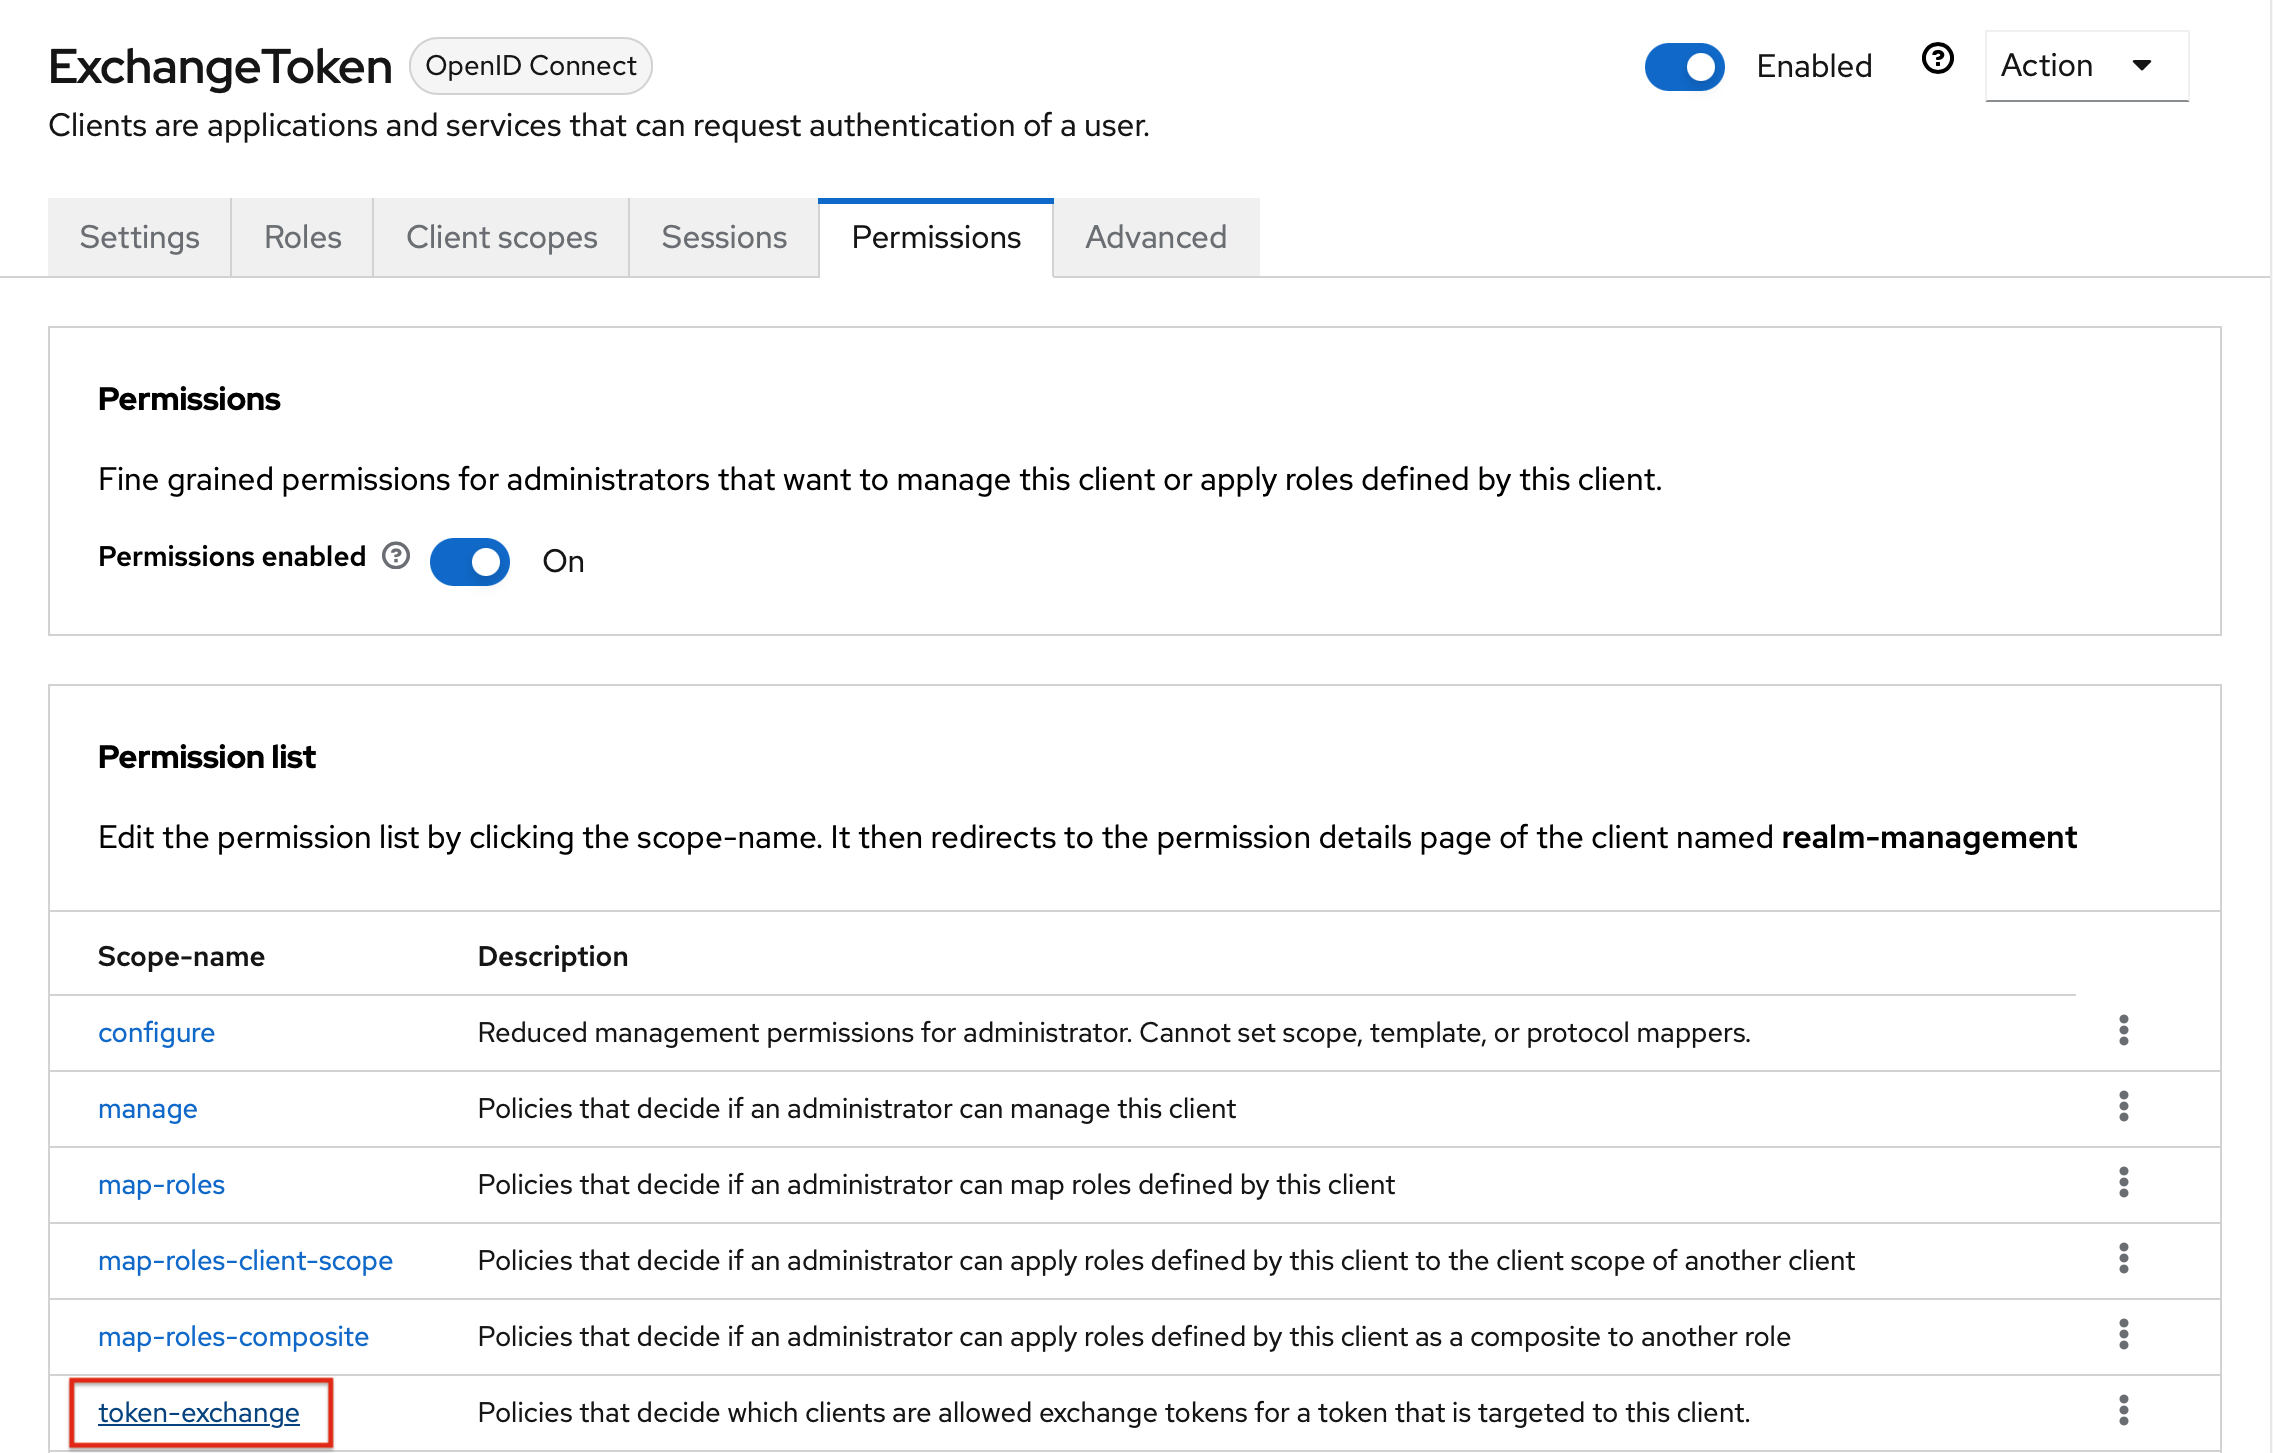
- Once the permission is enabled, select the token-exchange option to identify your policy, which allow to exchange token between the external services.
Apply your Client Policy
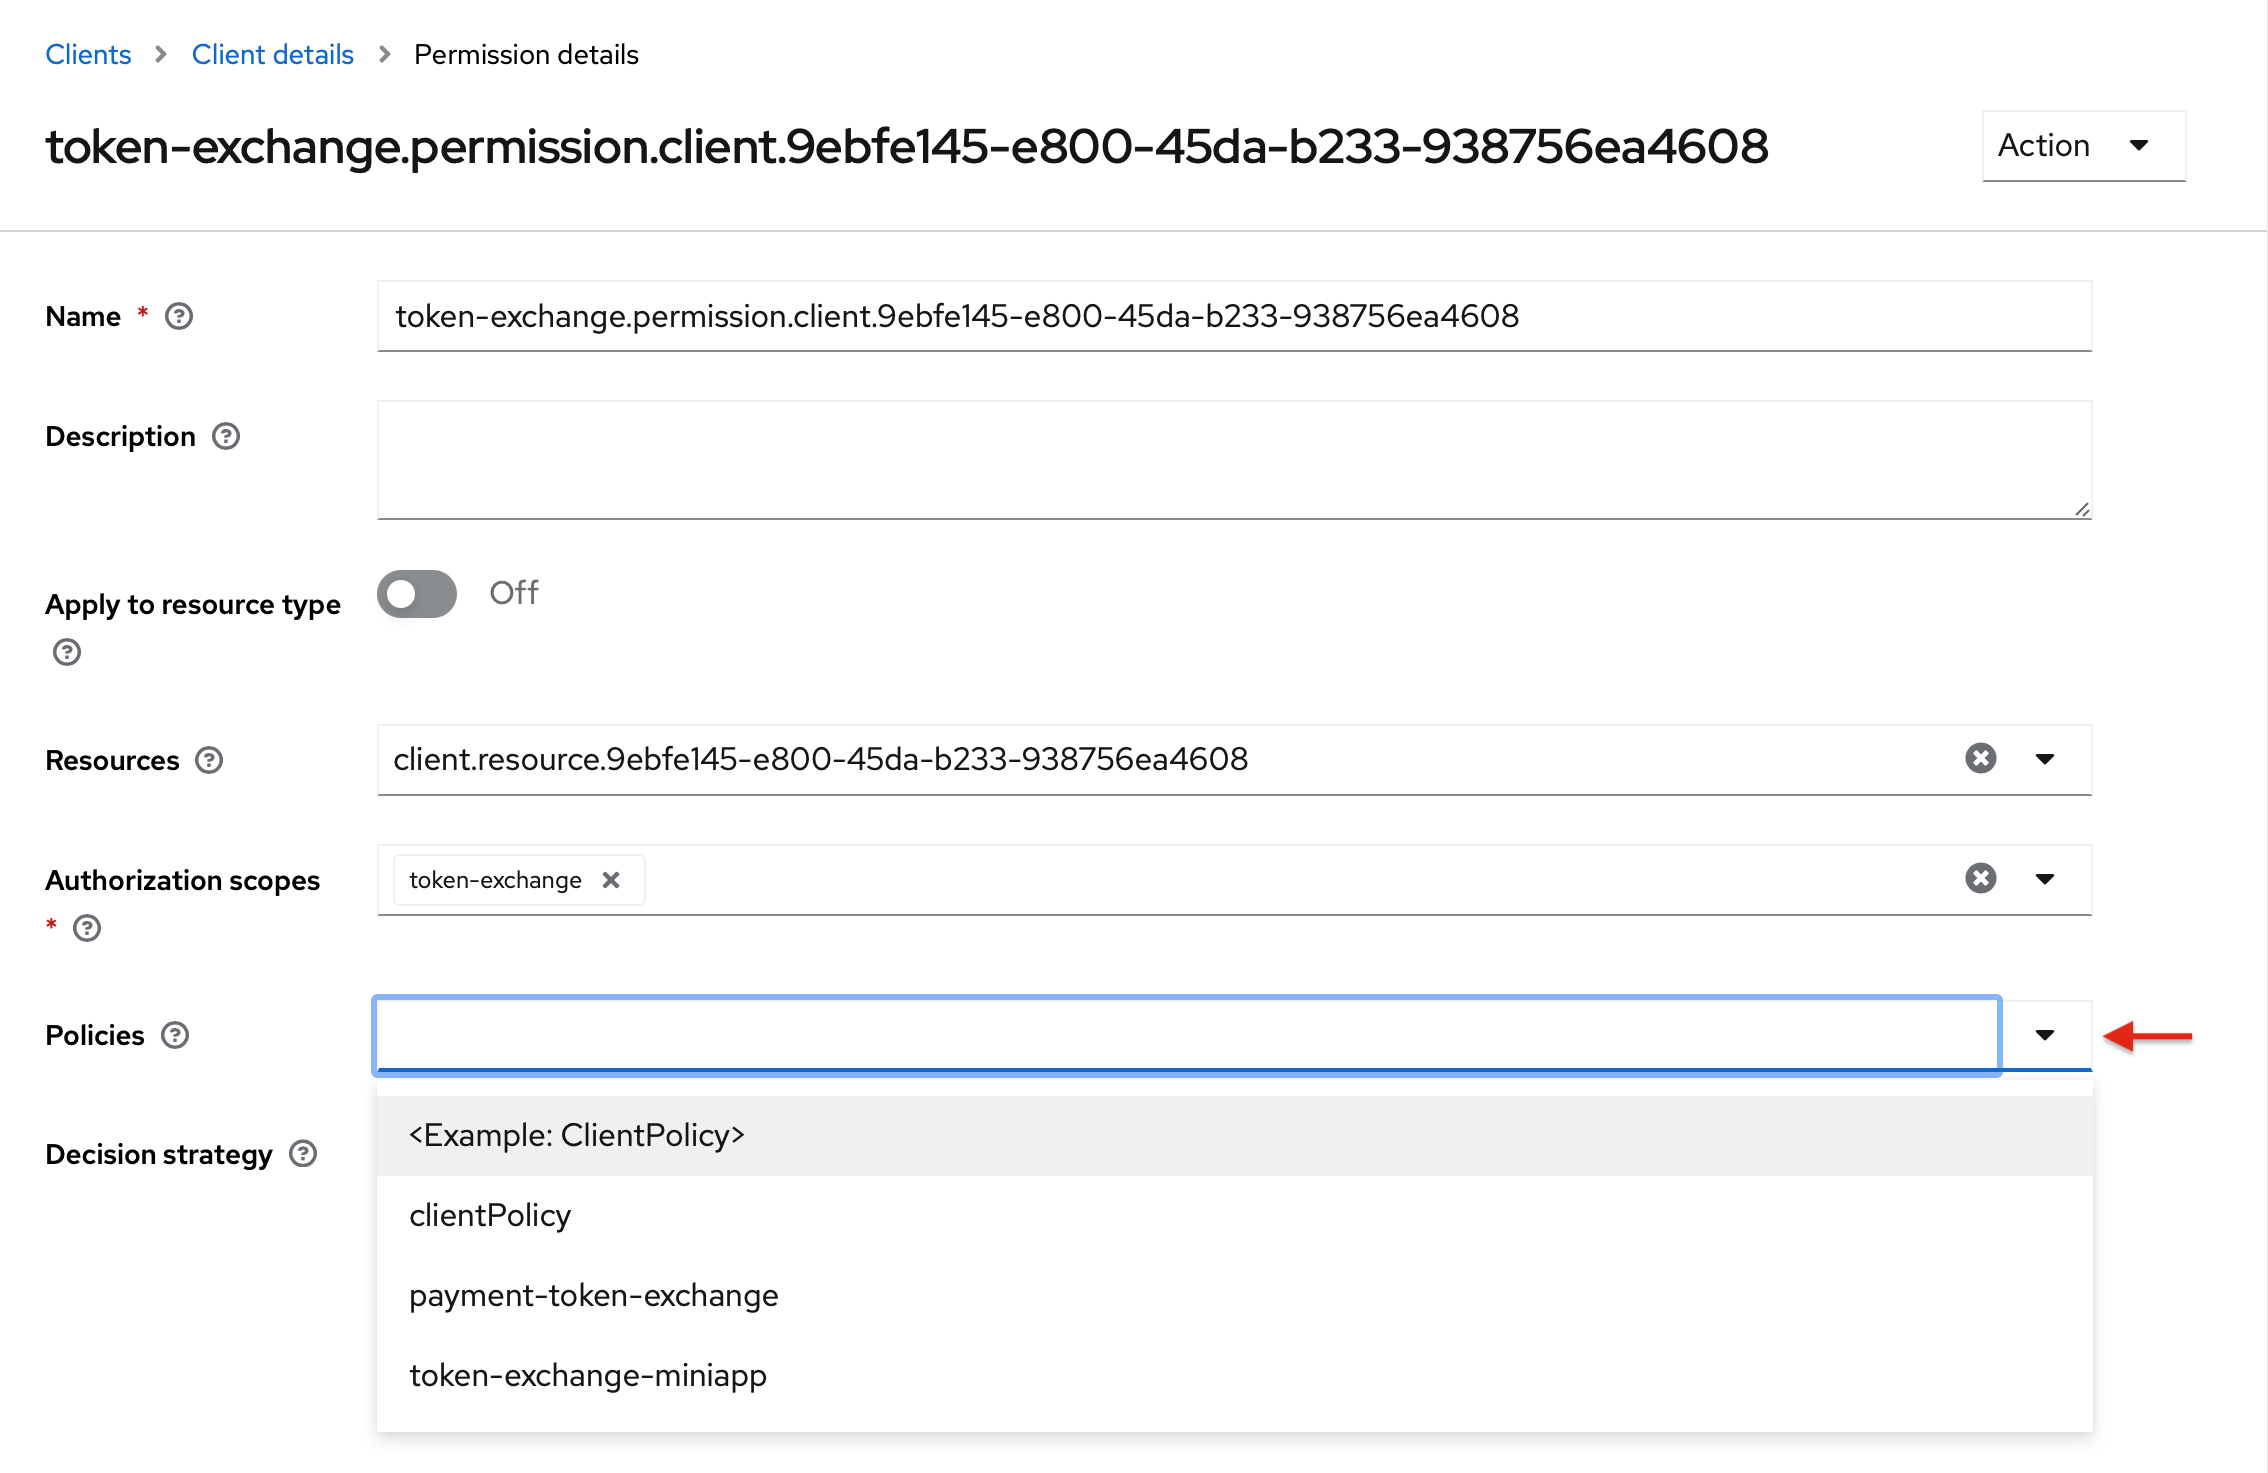
- In the final step, you could easily apply your created Client Policy, and save your changes.
Step3: Configure the Token Permission
Since the Exchange IAM Token requires audience to be triggered via Rest API or MC SDK, it's permissions are recommended to be configured.
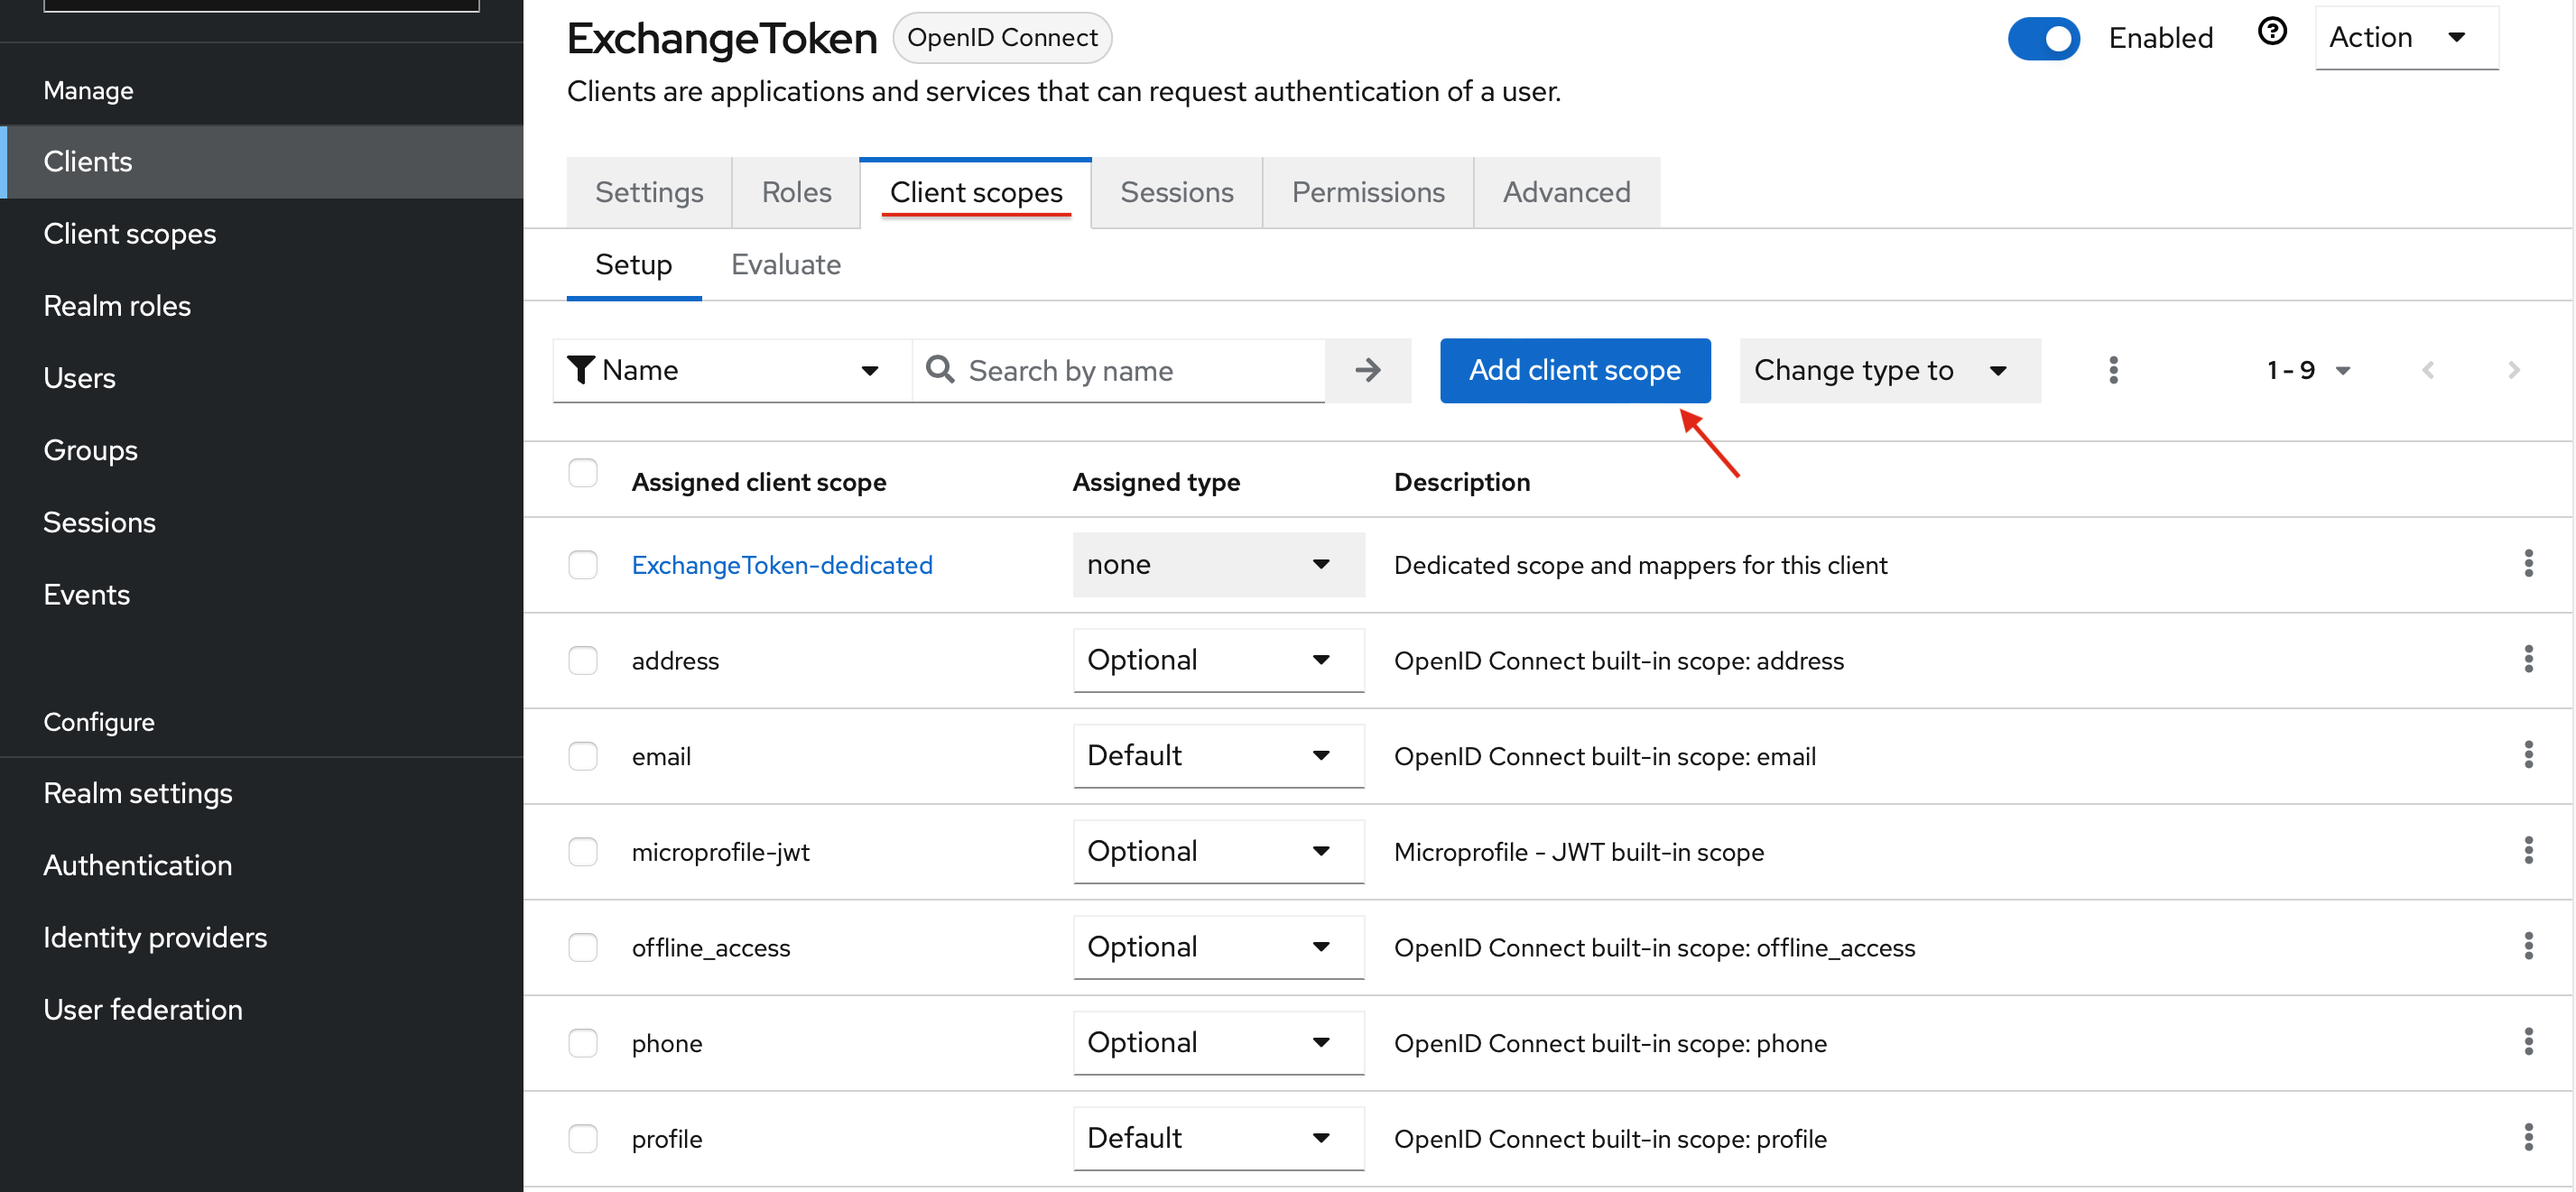
- Reach to the Client scopes -> Setup section of your Target Client, and press Add client scope button.
Add AST Token Mapper
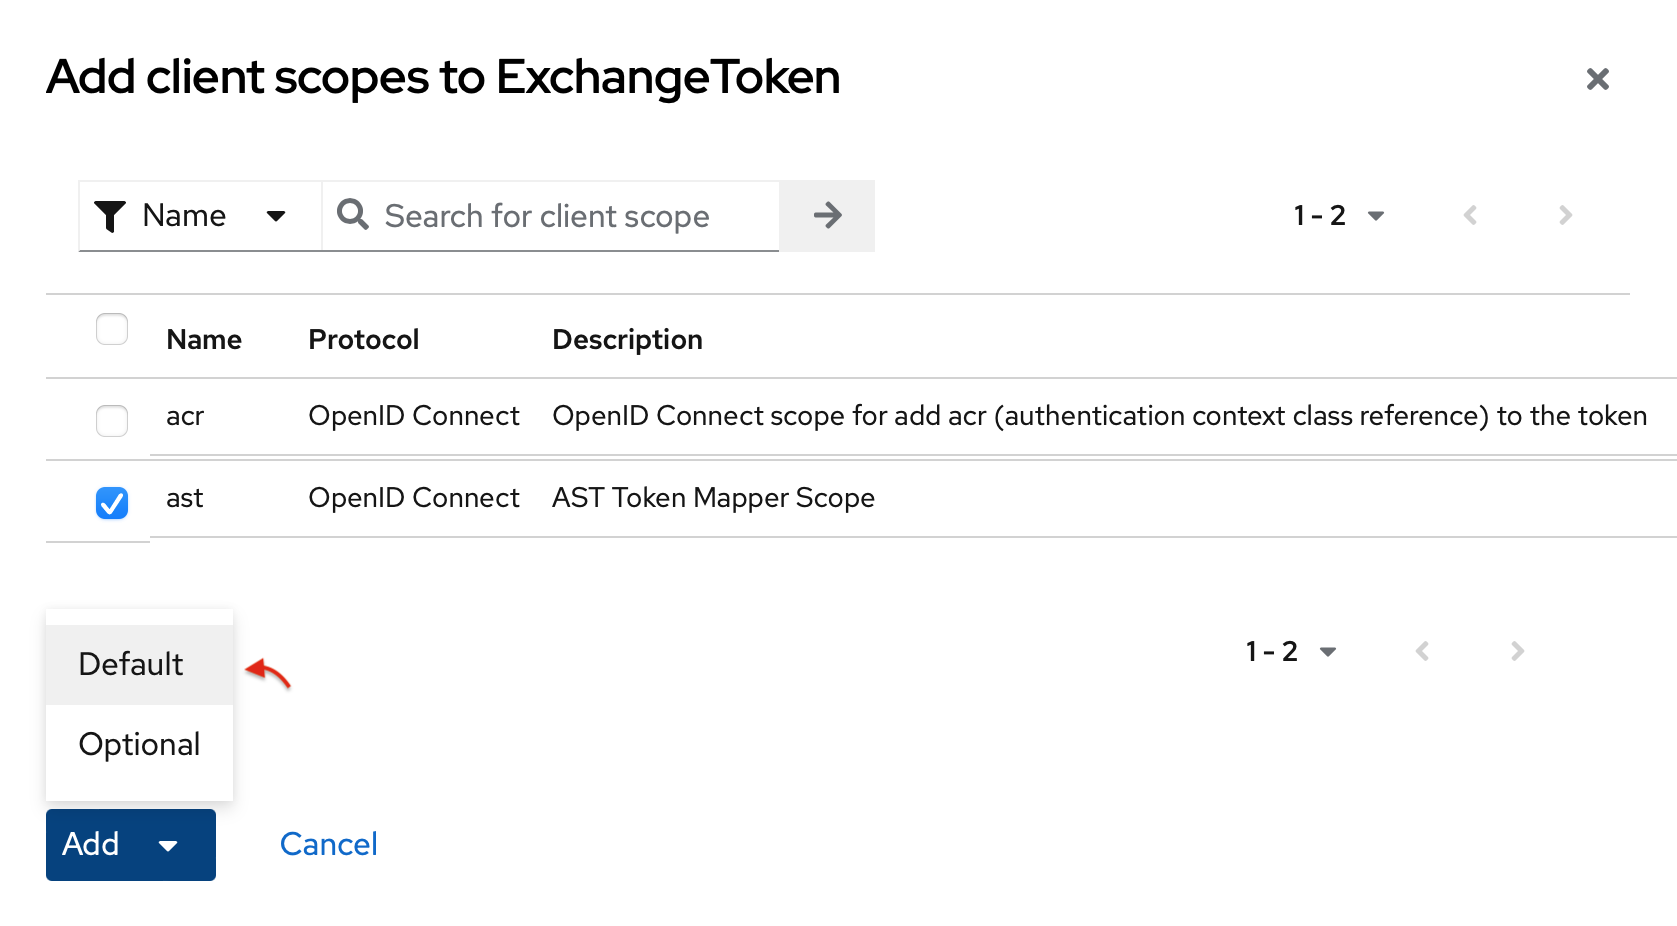
- To allow storing the user data in a secure way in the external services, you could assign AST Token Mapper as Defult.
Determine the Client's Dedicated
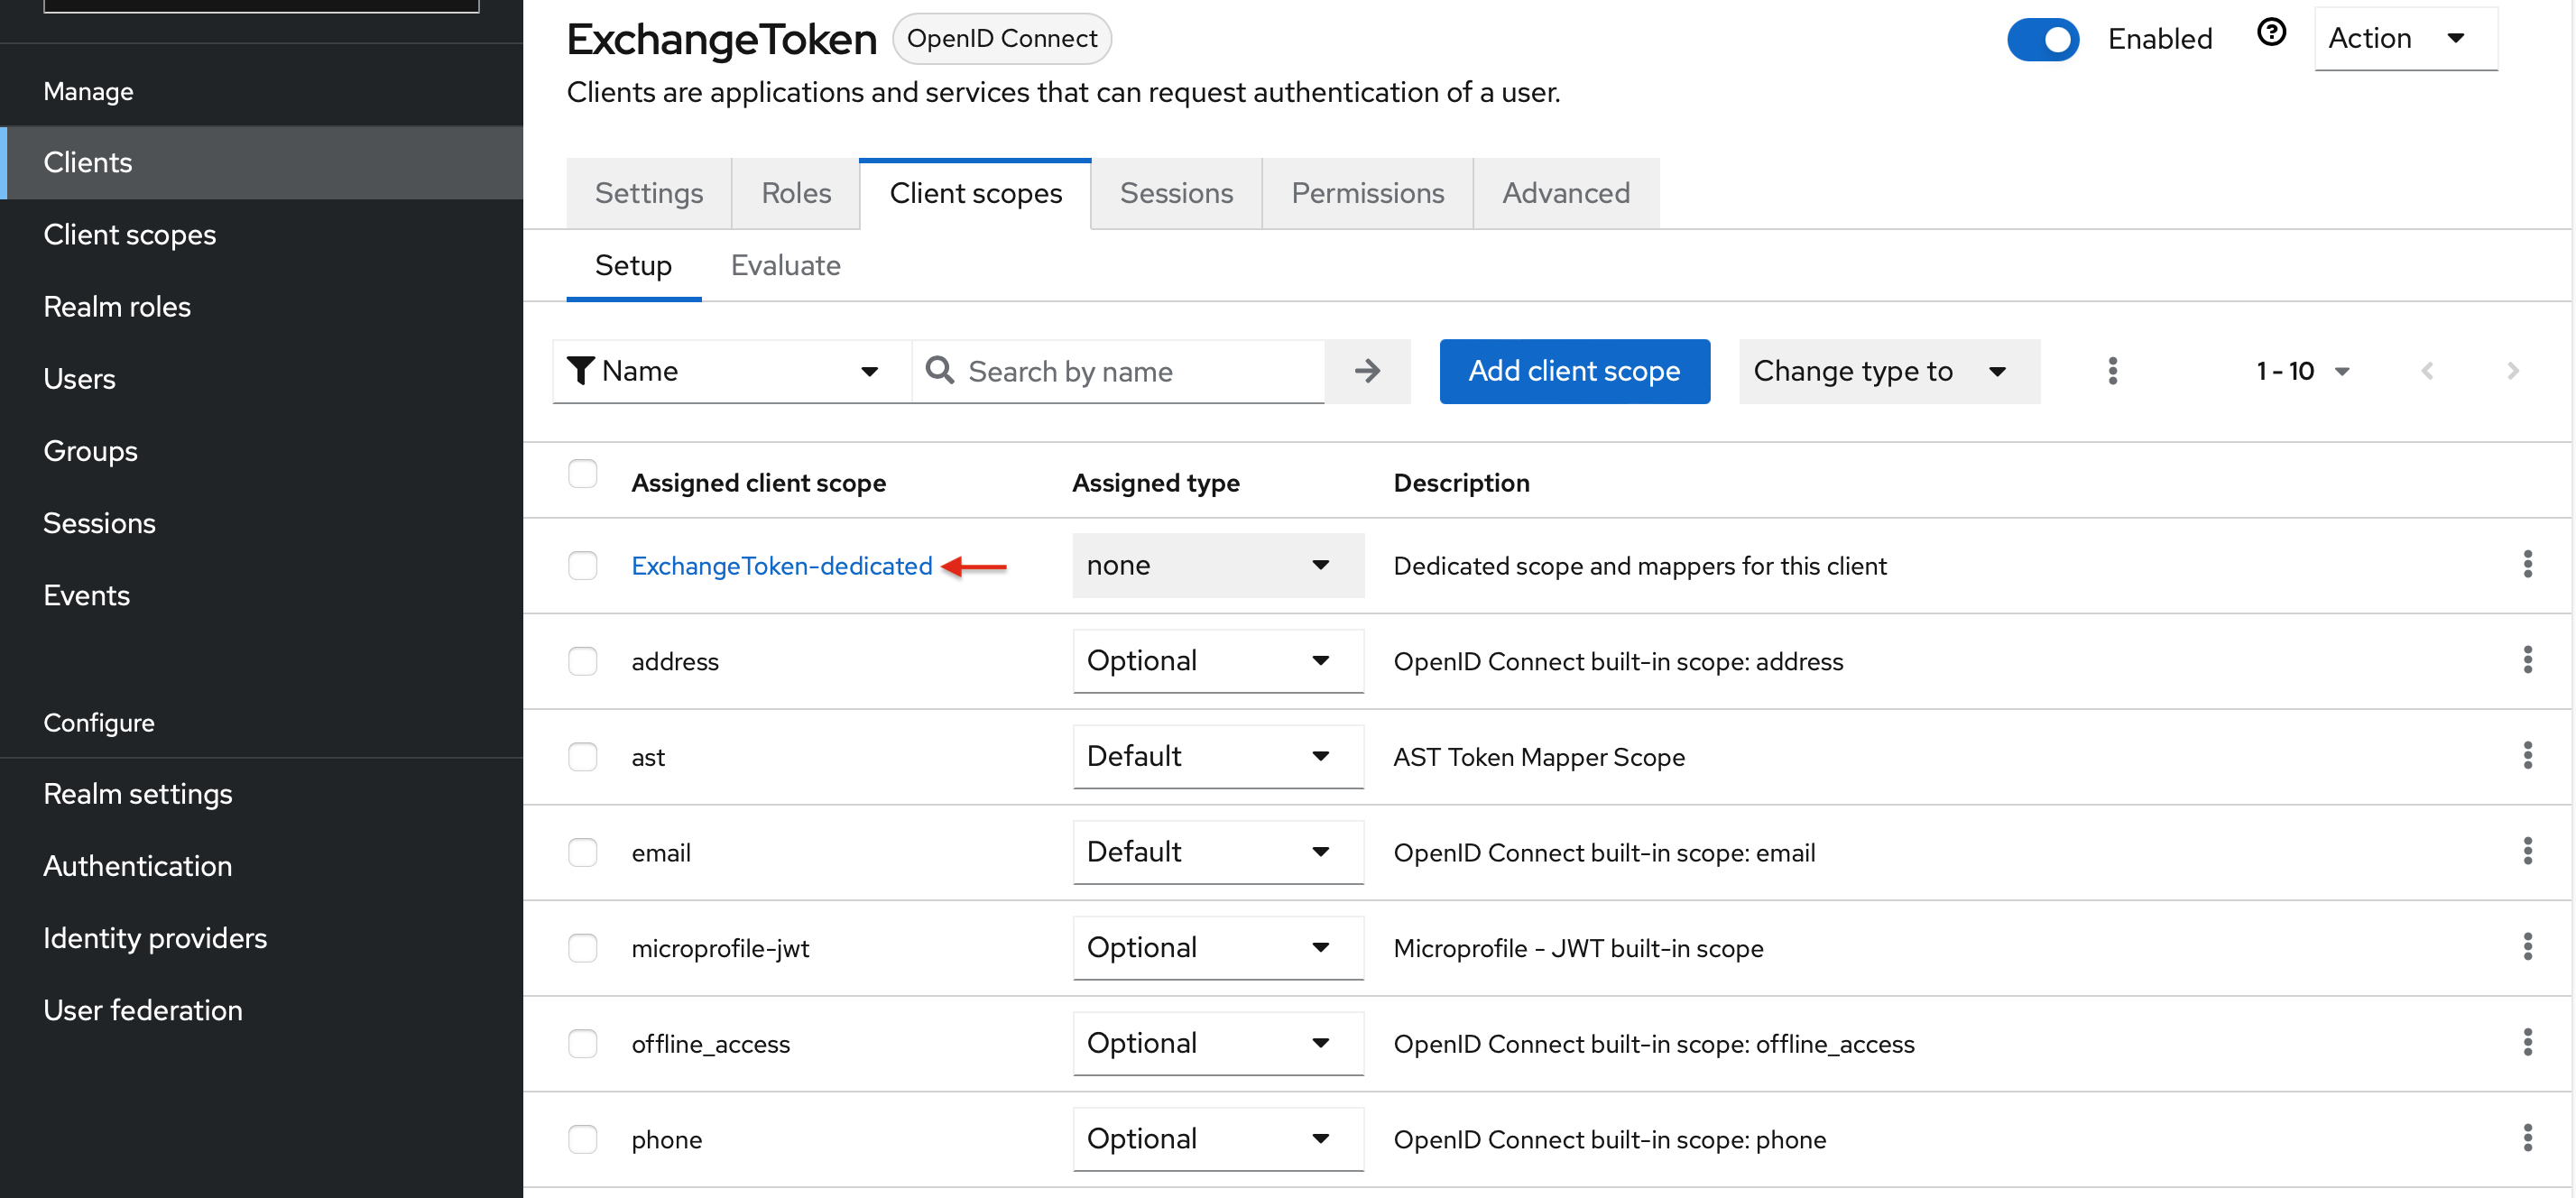
- Once the AST Token Mapper is assigned to your Target Client, press the TargetClientName-dedicated button, to start configuring your Client's Mappers & Scope.
Disable Full Scope
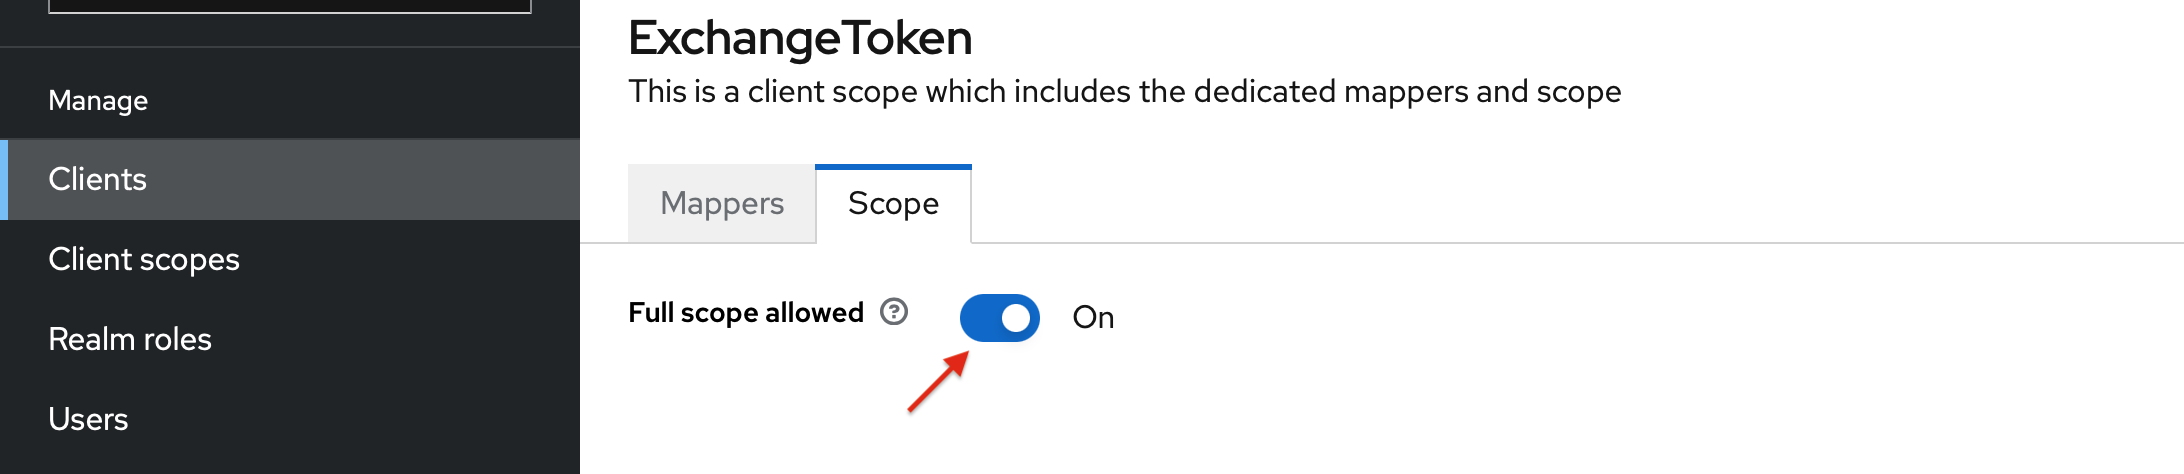
- Navigate to Scope section, then turn OFF the Full scope allowed option to initiate Client & Realm Roles.
Assign Minimal Permissions
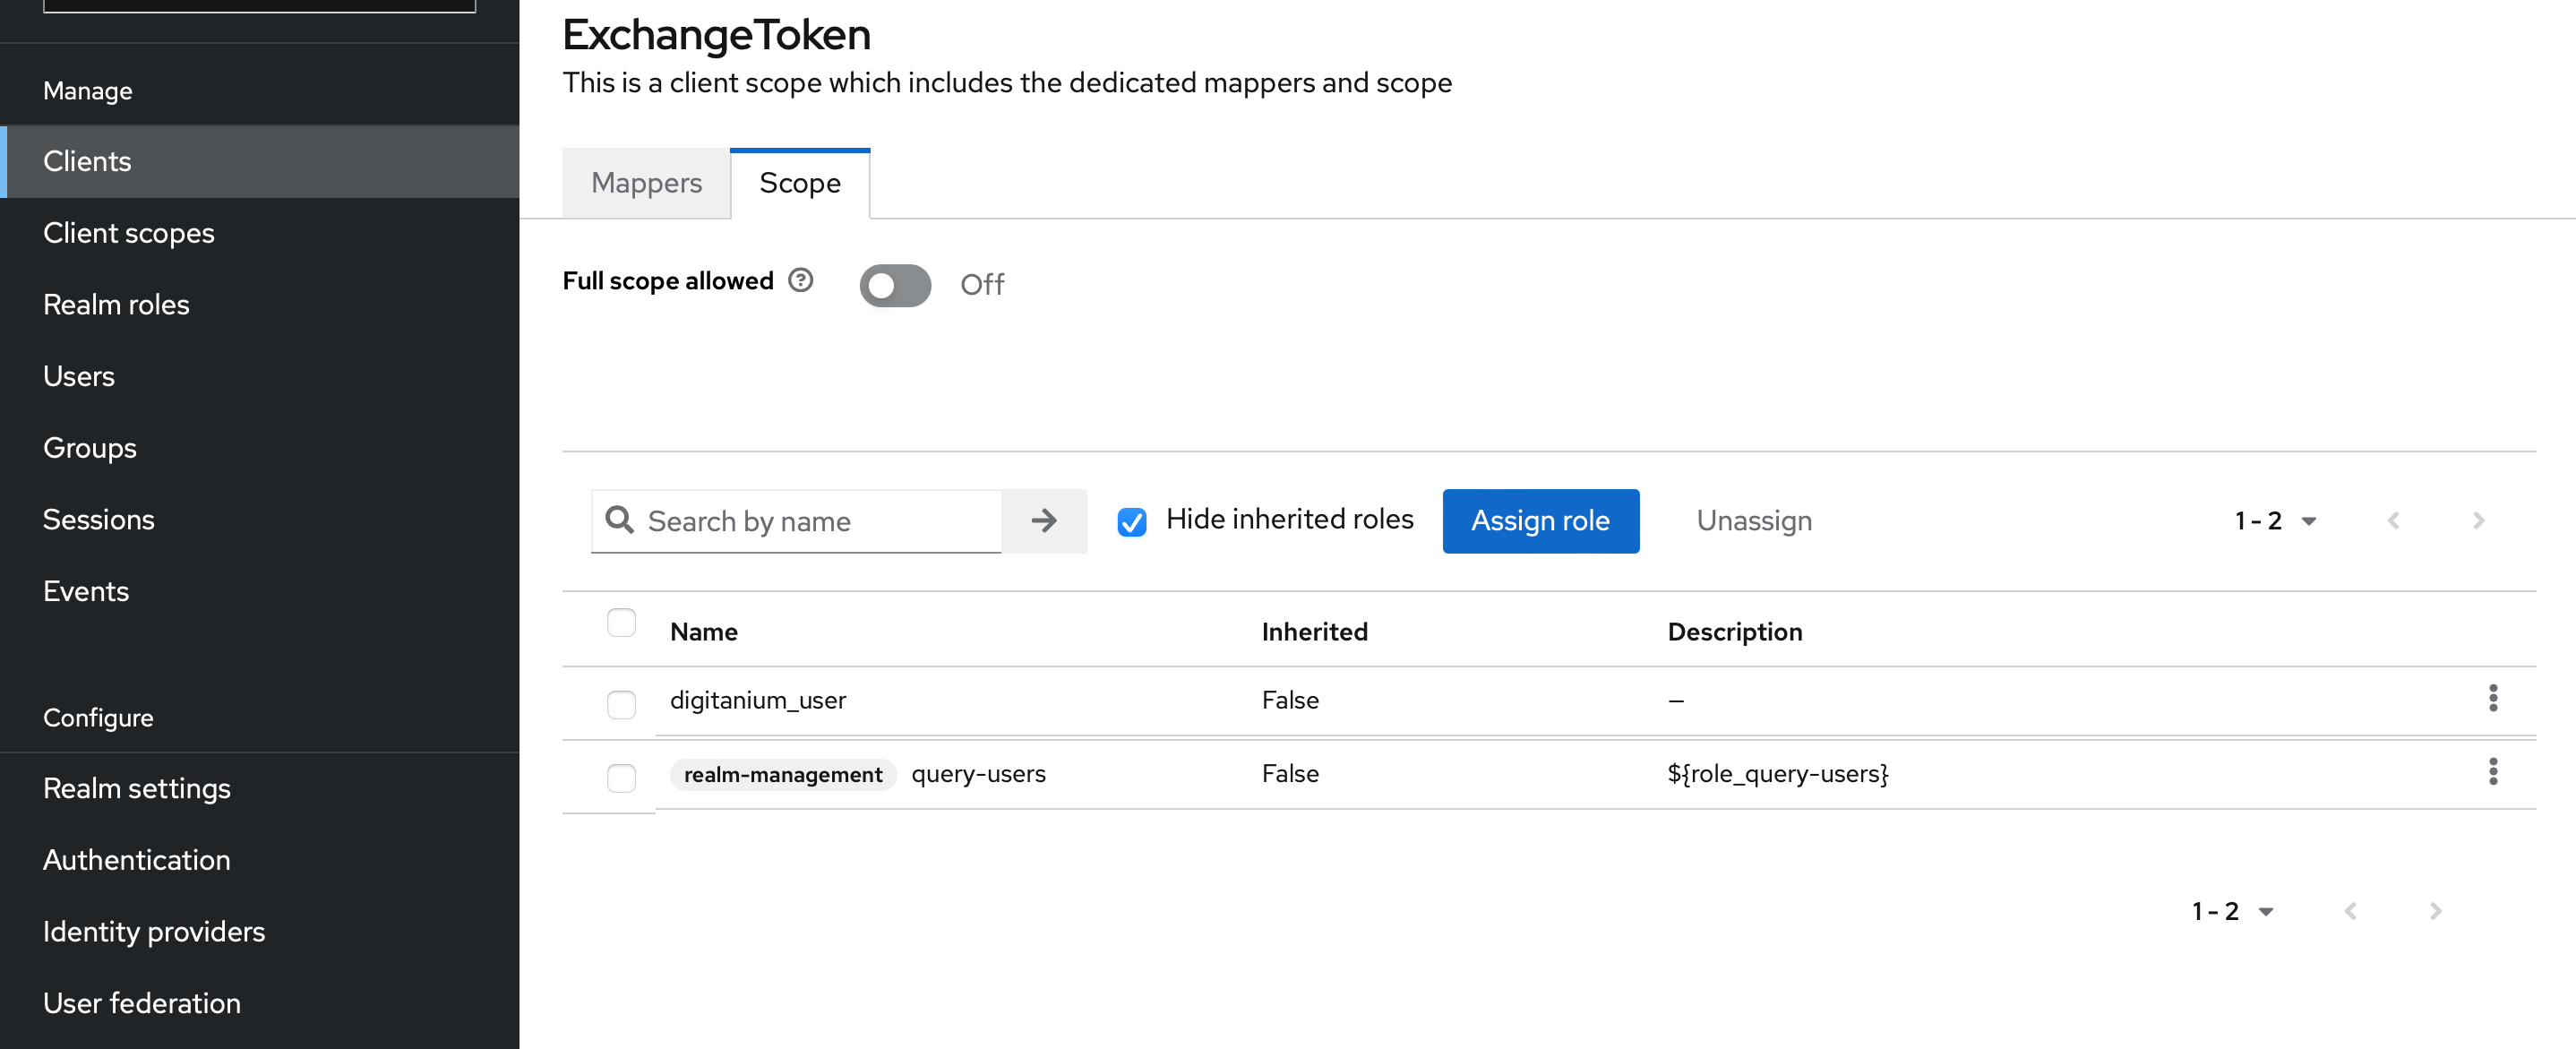
- To manage account activities via created tokens in the external services(Exchange IAM Token) with the minimal permissions;
- Assign the Scope roles as digitanium_user, and query-users to your Target Client(audience).
After adding all the permissions, this token can be used in external service requests such as getting a user's information by name or uuid. In this way MC-Token is secured and not exposed outside of MC SDK but this exchanged token is used for such operations.