SecOPTIC Views
Tokens view
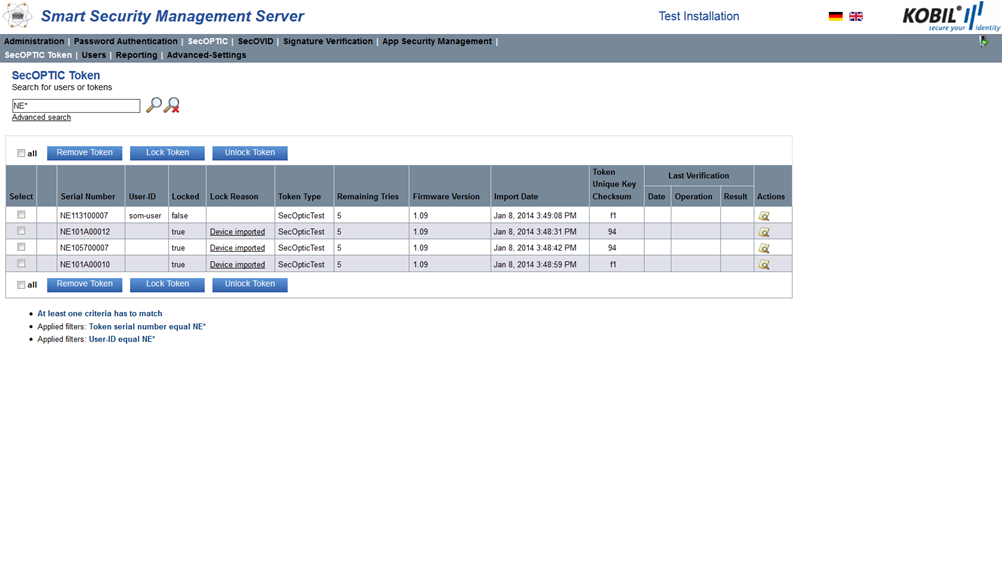
In the SecOPTIC Token view, you can manage your tokens. You can reach it via the menu option “SecOPTIC Module” → “SecOPTIC Token”. Here, all registered tokens are listed in a table (see Figure below). The search and filter options are described in the kernel manual in the chapter “Search”.

The list of this view informs you about the status of all registered tokens as well as their attributes, described in the following table.
Select | Checkbox for selection. |
|---|---|
Serial Number | Serial number of the SecOPTIC token. |
User-ID | The user assigned to the SecOPTIC token. |
Locked | The SecOPTIC token is locked (true) or unlocked (false) |
Lock Reason | The reason why the token is locked (for example “Device imported”). |
Token Type | The type of the SecOPTIC token: SecOPTIC compact SecOPTIC elegance |
Remaining tries | The counter decreases when an OTP could not be verified correctly. As soon as a correct OTP value has been entered, the counter is set to the maximum value again. |
Firmware version | Version number of the firmware. |
Import Date | Date on which the SecOPTIC token was registered on the KOBIL SSMS. |
Token Unique Key Checksum | The device unique key checksum. |
| Last Verification | Date | Operation | Result |
|---|---|---|---|
| Date on which the SecOPTIC token was last used. | The last operation carried out. Possible values are: “OTP” (Verification of the OTP value) or “Resync” (synchronization of the ATC between the SecOPTIC token and the KOBIL SSMS) | It shows whether the operation was successful (true) or not (false). | |
| Actions | Opens the protocol view of the SecOPTIC token | Opens the protocol view of the SecOPTIC token. |
Import SecOPTIC Tokens
SecOPTIC tokens can be imported via the external SecOPTIC application “Token Importer” or via the SOAP interface. After an import, the lock status of the devices is always “true” with the lock reason set to “Device imported”.

Lock or unlock and remove SecOPTIC Tokens
SecOPTIC tokens can be locked, unlocked or also removed. Select one or more SecOPTIC tokens via the checkboxes on the left and click the button of the operation you would like to carry out.
Lock Token
Tokens can be locked because of the following reasons:
- After the import, tokens are automatically locked (Lock reason: Device imported).
- The administrator locks the tokens in the SecOPTIC Token view.
- The administrator locks the tokens via the SOAP management interface and the function “lockToken”. • The user repeatedly used the wrong OTP.
The list of the possible lock reasons for a token can be configured and can be returned by the SOAP function “getLockReasons”.
The properties files for lock reasons are in the directory <SSMS_INSTALL>/modules/som/resources/som.
- token-lock-reasons-config.properties
- token-lock-reasons-config_de.properties
- token-lock-reasons-config_en.properties
Unlock token
The administrator can unlock a locked token in the view “SecOPTIC Token”.
Remove token
You remove devices from the list, by selecting the desired SecOPTIC token and clicking the button “Remove Token”.
Users view
In the user view, you can register users and assign activation codes to them. In the users view, all users and their corresponding attributes are listed in tabular form (also users with no token). check picture below for details:
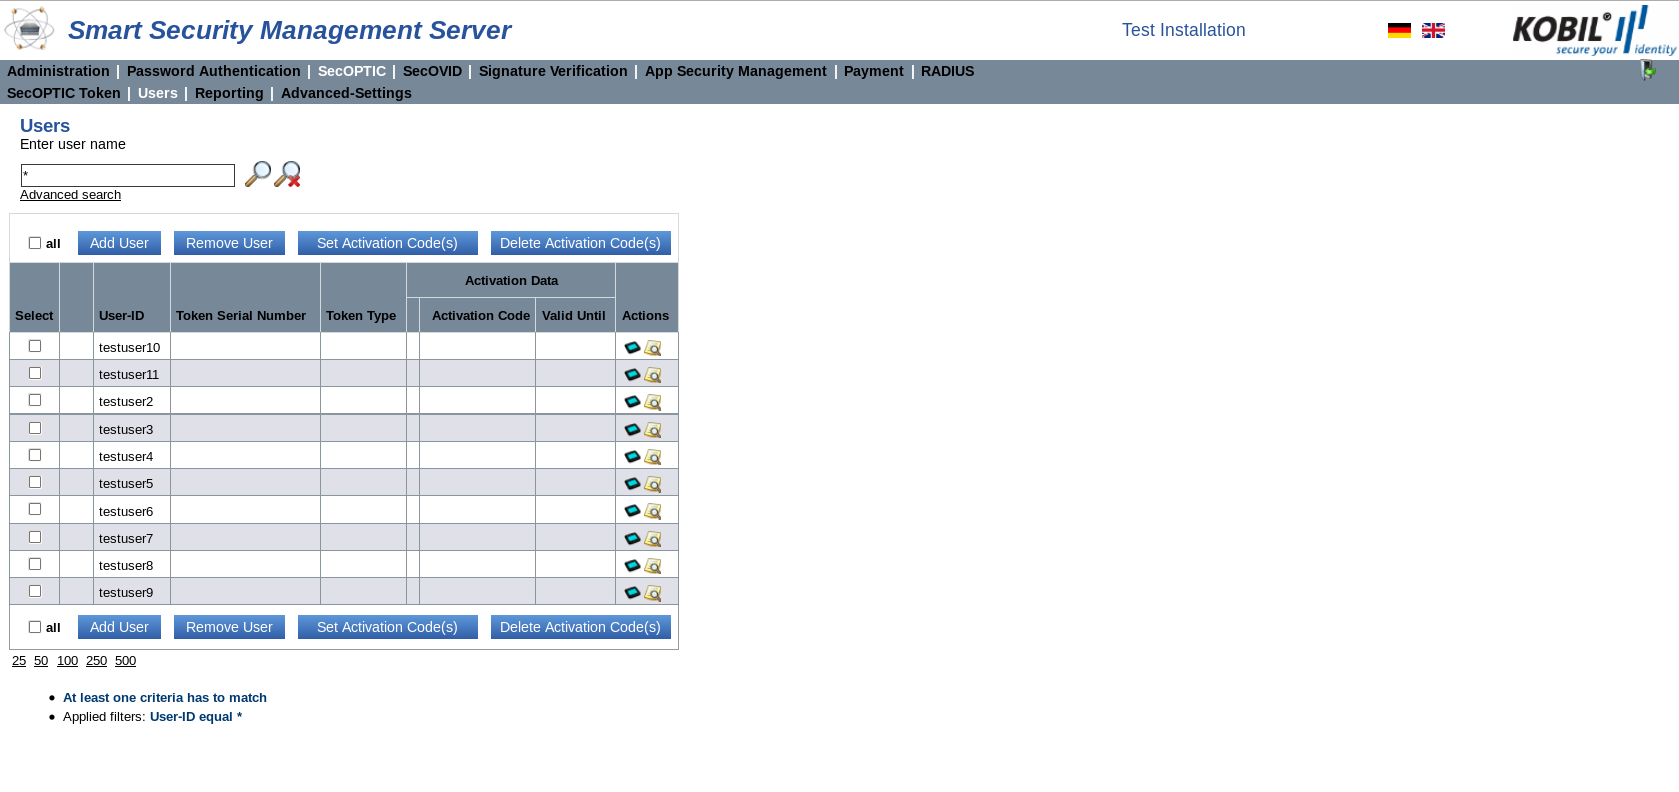
The list of this view informs you about the status of all registered users as well as their attributes as described in the following table:
| Select | Checkbox for selection of one or more entries |
|---|---|
| User-ID | String that defines the user ID |
| Token Serial Number | Serial number of the assigned SecOPTIC token |
| Token Type | Type of the SecOPTIC token * SecOPTIC elegance * SecOPTIC compact |
| Activation Data | Activation Code | Activation code as string |
|---|---|---|
| Valid until | Validity of the activation code | |
| Actions | List of tokens owned by the user | |
| Protocol view of the user |
Note: The KOBIL SSMS manages users across all the installed modules. This means, the users displayed in this view are also available in other modules or views, for example in the view for managing ASM devices.
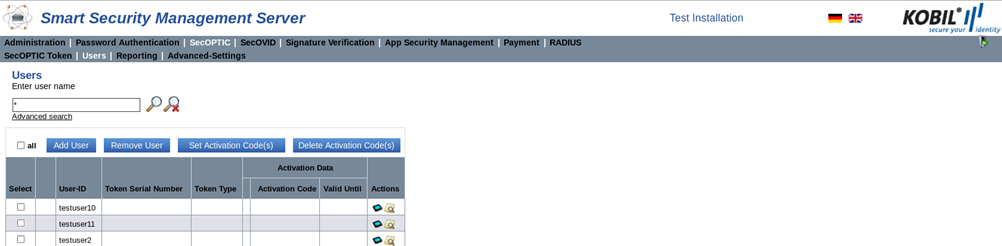
Add user
Via the button “Add user”, single users can be added to the database. The user ID must be entered in form of a string and must be unique. You can only enter a user ID at a time.
The additional user attributes like the activation code must be defined manually. This can also occur later on.
Remove user
Select the user to be deleted in the table in the column “Select” and click the button “Remove user”. You will then be prompted to confirm the deletion.
Removing a user can also result in a failure; the failure is reported in the status column on the left of the user ID and a notification is shown above the table.
Set activation code
With an activation code, a token can be securely assigned to a user in self-service on a web portal.
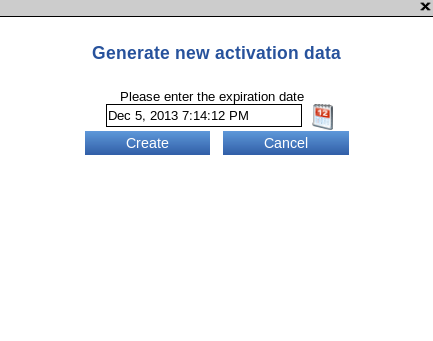
The activation code is a one-time password (OTP) set by selecting the user and clicking the button “Set Activation Code(s)”. The activation code legitimates the user for the process of assigning a SecOPTIC token to himself. In order for the user to have a SecOPTIC token assigned, the user must enter his user name, his activation code, the token serial number as well as a valid OTP of the SecOPTIC token. The service node offers a corresponding SOAP function to integrate this process.
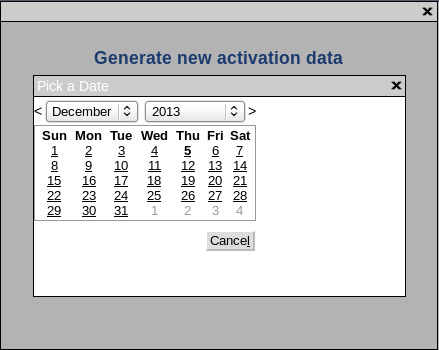
Via the button „Set Activation Code(s)“ a window pops up where new activation data with a certain validity can be generated. To choose a date, you can use the calendar view as below.
Delete activation codes
You delete an activation code by selecting the activation code you want to delete and clicking the button “Delete Activation Code(s)”. A dialog box prompts the user to confirm the action of deleting the code.

Reporting view
Via the reporting view, previous actions can be viewed.
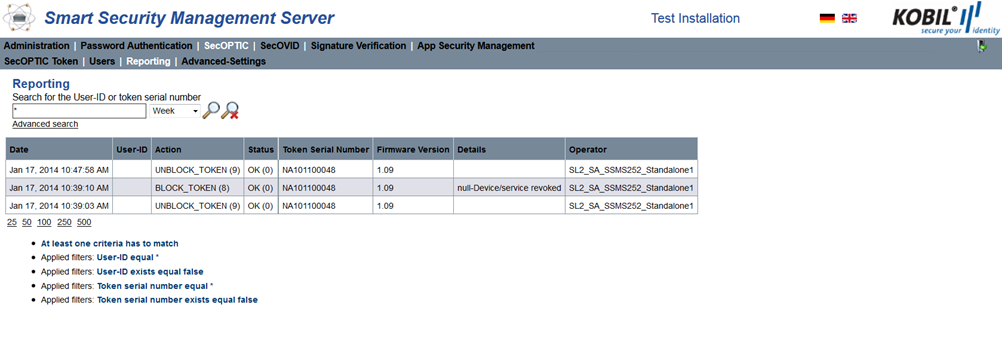
The list of this view informs you about the status of the token and the actions carried out as well as their attributes, as described in the table below:
Date | Date in which the action was carried out. |
|---|---|
User-ID | User-ID defined as a string. |
Action | The actions that were carried out (given by the system) |
Status | Notification about the successful or the unsuccessful result of action with the corresponding code. |
Token Serial Number | Serial number of the assigned SecOPTIC token. |
Firmware Version | Version number of the firmware of the token. |
Details | Description of the action. |
Operator | Operator that carried out the action |
Advanced-Settings view
Settings in the Advanced-Settings view can only be modified by the super administrator and the administrator.
This paragraph explains the advanced settings and the configuration options of the SecOPTIC Module you can set in this view. The values depicted in the table are default values.
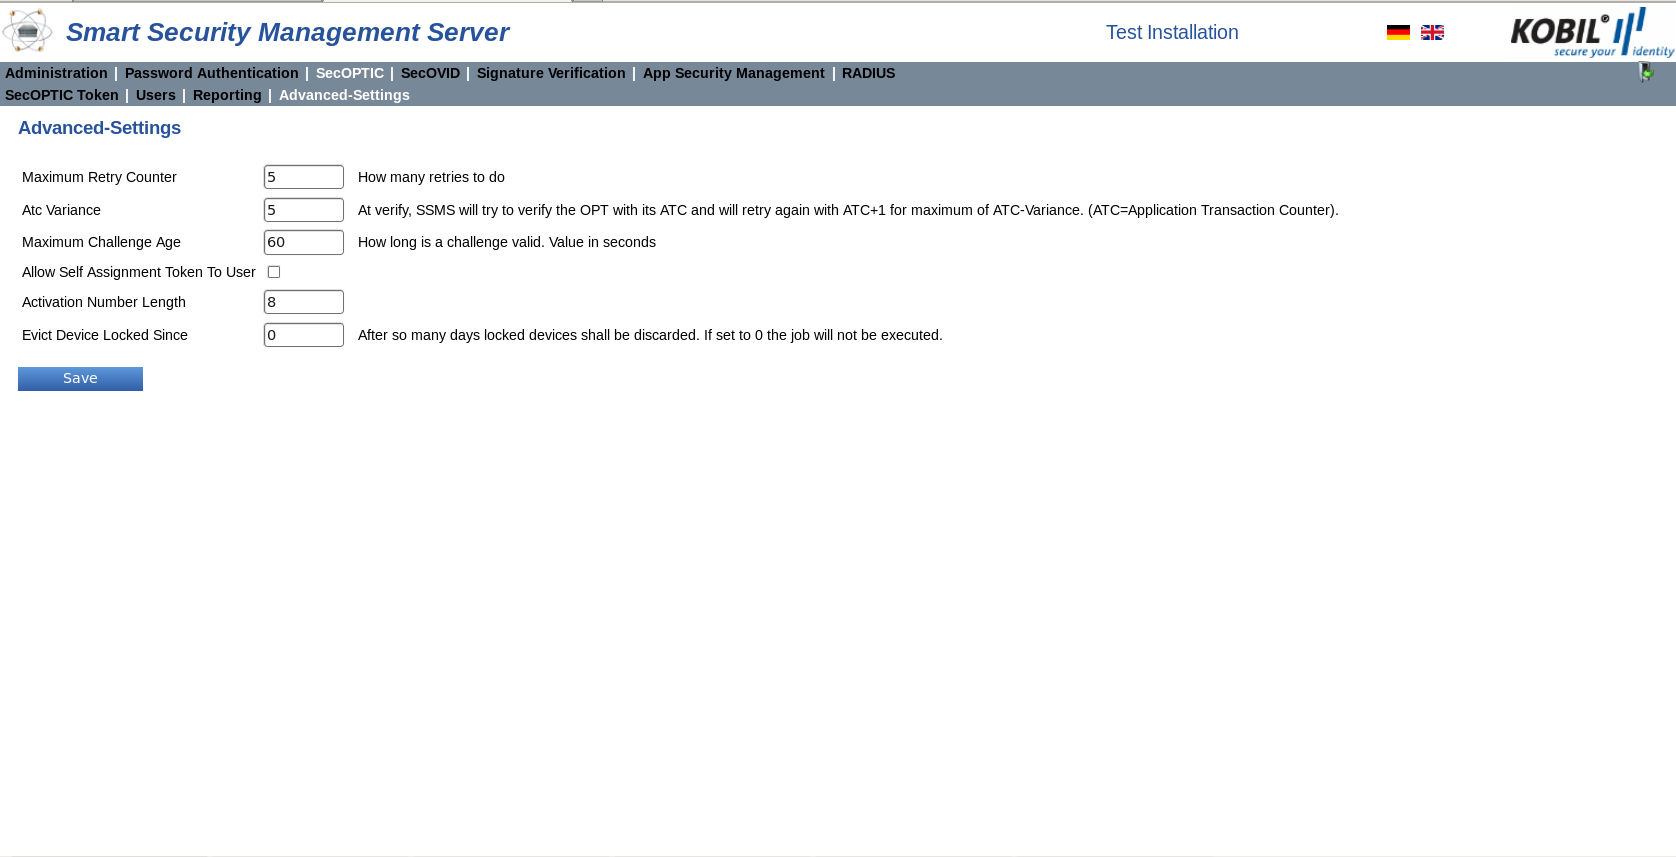
The following configuration parameters can be adjusted in this view.
Maximum Retry Counter | The maximum number of retries. Default value is set at 5 retries. |
|---|---|
Atc Variance | If the verification of an OTP with its ATC (Application Transaction Counter), fails, then the verification with ATC+1, ATC+2 until ATC+[ATC-Variance] is tried. |
Maximum Challenge Age | The maximum validity in time (seconds) of a challenge. Default value is 60. |
Allow Self Assignment Token to User | This option allows the assignment of locked tokens to users. If this option is activated, users can assign token to themselves, even if the token is locked. When the token is assigned, its locked status switches automatically from true to false. If this option is inactive, the administrator must unlock the token before the user assigns himself the token. |
Activation Number Length | Length of the activation number. Default value is 8. |
Evict Device Locked Since | Period of time after which locked devices are removed from the database. Value in days. If the parameter is set to 0, the job is not executed. |