Authentication Configuration
Authentication Flow
An authentication flow is a container for all authentications, screens, and actions that must happen during login, registration, and other workflows. mID Provider(IAM) platform enables multiple authentication methods powered by KOBIL to enable required workflows. You will be able to define and configure all the authentication flows in the system including actions that each of the flow requires.
Authentication flow is the sequence of actions an user or a service needs to perform in order to be authenticated.
Note: Authentication flows are important security functionality. A badly created flow could either let no user login, let users login with less authentication, or simply result in an error.
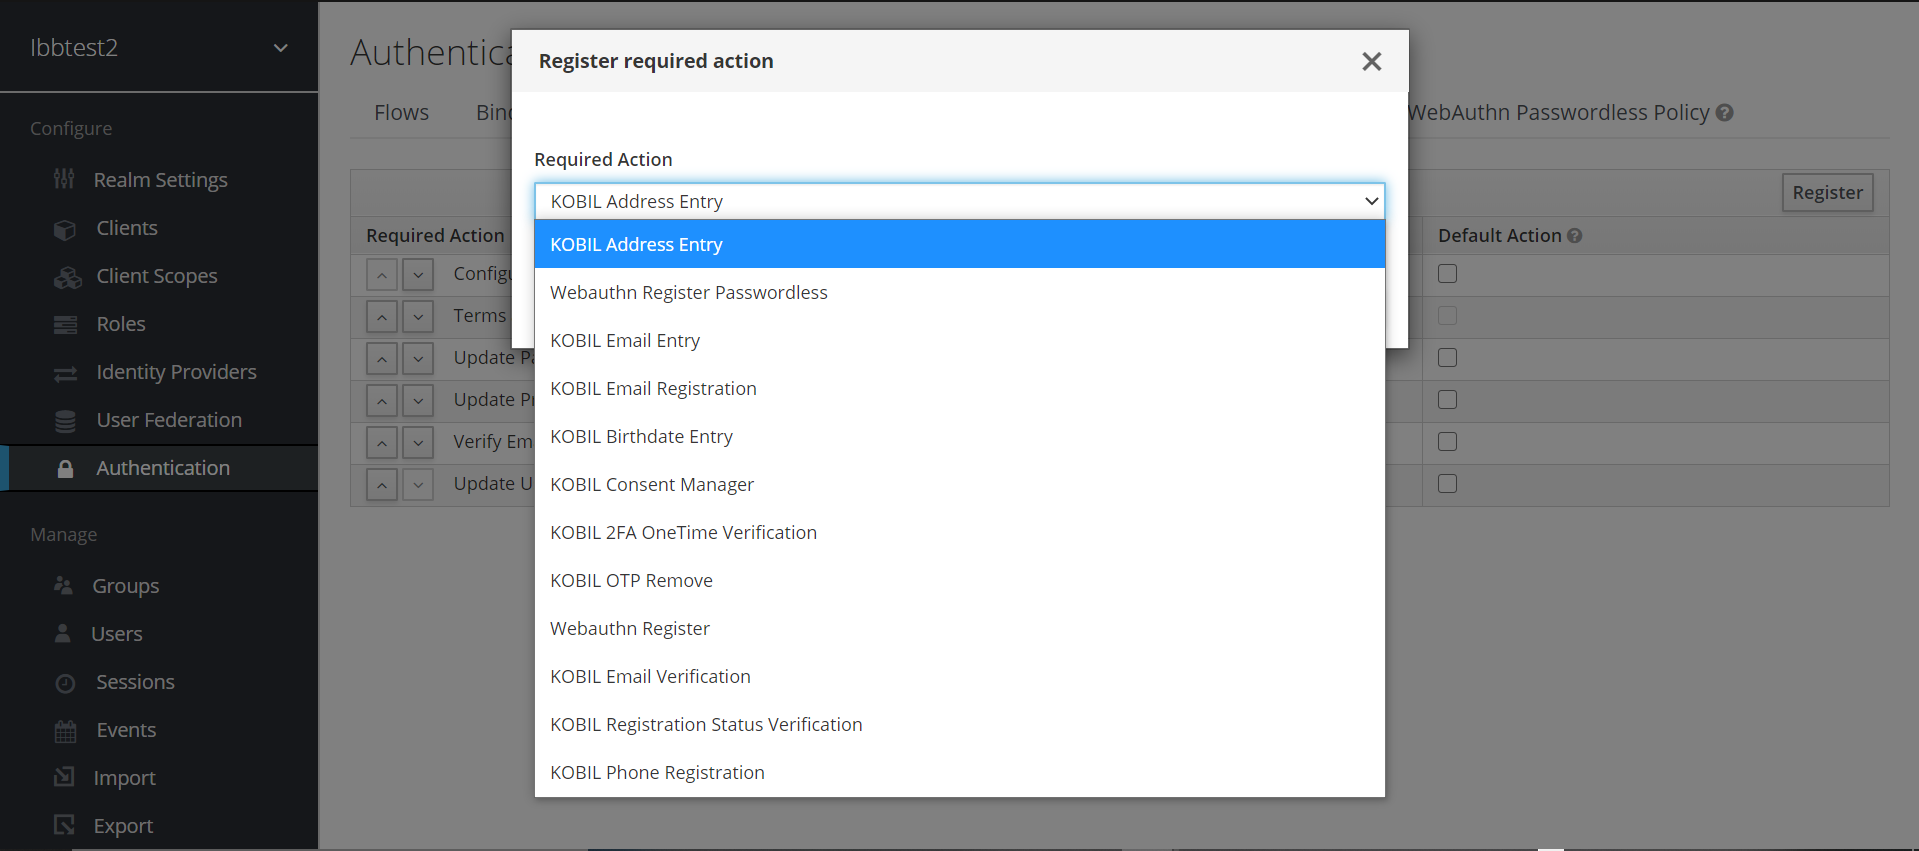
Required Actions
Required Actions are tasks to be performed by the user during the authentication process. A user will not be allowed to login until all the required actions are completed. Listed below are the required actions provided by mID.
- Webauthn Register Passwordless
- KOBIL Email Registration
- KOBIL Phone Registration
- KOBIL Consent Manager
- KOBIL 2FA OneTime Verification
- KOBIL OTP Remove
- Webauthn Register
- KOBIL Registration Status Verification.
- ConfigureOTP
- Terms and Conditions
- Update Password
- Update Profile
- Verify Email
- Update User Locale
- Kobil Update Password
Note: OTP bruteforce lock is applicable for KOBIL Phone Registration and KOBIL Email Registration.
Default Required Actions:
When a new realm is created a list of default required actions are mapped to it, which can be easily modified by enabling/disabling or Registering other custom Required actions.

Note: The required actions can be separately configured for each user as well. Refer User management.
Built-in flows
mID Provider comes with a certain number of built-in flows. These flows cannot be modified, but the requirements can be modified to suit your needs.
How to create custom Authenticator Flow
Authentication flow contains of main elements
- Top Level flow (authentication flow)
- Execution flow
- Sub-Execution flow
- Execution
Step 1: Create Top Level flow
To create a Top Level flow flow, you can either:
-
Copy and then modify an existing flow. To do this select an existing flow (for example the
Browserflow), and press theCopybutton. This will then ask you to set a name for the new flow, before creating it. -
Create a new flow from scratch. To do this press the
Newbutton. Since this is the more general case, we will use this for our example.Parameter Description Alias The name of the top level flow Description The description you can set to the flow. Top Level Flow Type The type of flow. the type clientis used only for the authentication of clients (applications). For all other cases choosegeneric.
Once the flow is created, in addition to the New and Copy buttons, you now have, Delete, Add execution and Add flow.
Note: Deleting the flow in usage may cause user or clients not be able to login.
Step 2: Create Execution flow and/or Add execution
Create Execution flow
Create a new flow from scratch. To do this press the Add flow button.
Create Sub Execution flow
Sub-Execution flows can be added in top level flow with the Add flow button, which opens a Create Execution Flow page that is very similar to the Create Top Level Form page. The only difference is that the Flow Type can be either generic (like before), or form. The form type is used to construct a sub-flow that generates a single form for the user, like what is done for the built-in Registration flow. Sub-flows are a special type of execution that evaluate as successful depending on how the executions they contain evaluate (and this includes the evaluation of their contained sub-flows). And the logic of this evaluation depends on the Requirement of each execution and sub-flow.
Add execution
Executions can be added with the Add execution button. Executions can have a wide variety of actions, from sending a reset email to validating an OTP. If you hover over the tooltip (the tiny question mark) next to Provider, this will describe what the execution does.
These can be divided into automatic executions and interactive executions. Automatic executions are similar to the Cookie execution, and will automatically perform their action when they are encountered in the flow. Interactive executions will halt the flow, usually to get some user input. Executions that execute successfully will get the success status. This is important, because this is part of whether a flow is successful or not. For example, an empty Browser flow would not allow anyone to log in. For that it would need at least one execution that successfully evaluates, for example a Username Password Form that is corrected filled and submitted.
Step 3: Configuration of Requirements
-
Required
For a flow to be evaluated as successful, all required elements in the flow must evaluate as successful. This means that all Required elements in the flow must be sequentially executed, from top to bottom, unless one of the elements causes the flow to fail. However, this is only true for the current flow. Any Required element within a sub-flow is only processed if that sub-flow is entered.
-
Alternative
When a flow contains only Alternative elements, only a single element must evaluate as successful for the flow to evaluate as successful. Because the Required flow elements within a flow are sufficient to mark a flow as successful, any Alternative flow element within a flow that contains Required flow elements will never be executed. In this case, they are functionally Disabled.
-
Disabled
Any Disabled element is not evaluated and does not count to mark a flow as successful.
-
Conditional
This requirement type can only be set on sub-flows. A Conditional sub-flow can contain a "Condition" execution. These "Condition" executions must evaluate as logical statements. If all "Condition" executions evaluate as true then the Conditional sub-flow acts as Required. If not, the Conditional sub-flow acts as Disabled. If no "Condition" execution is set, the Conditional sub-flow acts as Disabled. If a flow contains "Condition" executions and is not set to Conditional, the "Condition" executions are not evaluated, and can be considered functionally Disabled.